Category Archives: vegetable side

Hedgehog and chanterelle wild mushroom frittata

Thanks to all of this wonderful rain, the hunting is finally good for mushrooms! I was super lucky at the annual Mendocino mushroom foray and this time I found the mother lode of hedgehog mushrooms :) Hedgehogs are related to chanterelles and many of my mushroom hunting friends like them even more than their beloved cousins.  The scientific name is Hydnum umbilicatum, but they are called hedgehogs because they have spiny teeth instead of gills !

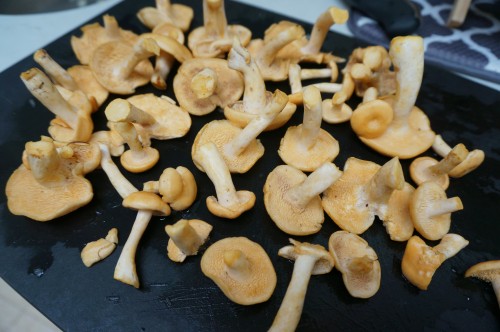
Check out the spiny teeth on un the underside of these beautiful hedgehog mushrooms!

Check out the spiny teeth on un the underside of these beautiful hedgehog mushrooms!

I’ve never found so many choice edibles in one spot before. I was very excited to bring some home to Los Angeles over Thanksgiving break! On that Friday morning, I went to my friend Lauren’s house to share my mushrooms with friends and enjoy a post-Thanksgiving day breakfast.  With all of these gorgeous mushrooms, I decided to make a frittata. A frittata is a simple, baked egg dish where you can basically add any ingredients you want (any vegetable you have lying around, meat, cheese, herbs, you name it!), and then you throw it in the oven. Since I’ve been so mushroom deprived until now, I decided to keep it simple and keep mushrooms front and center in this dish. I caramelized a white and red onion to add some flavor, but that was the only other ingredient besides mushrooms and eggs (and salt and pepper of course!).

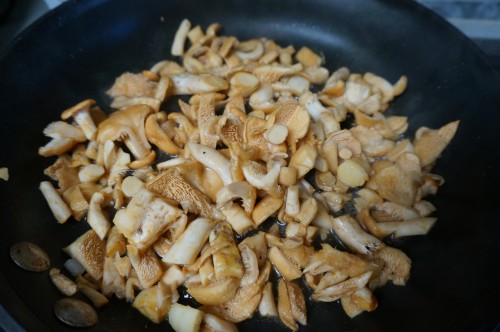
Hedgehog mushrooms cleaned and cut in a heated pan

Hedgehog mushrooms cleaned and cut in a heated pan

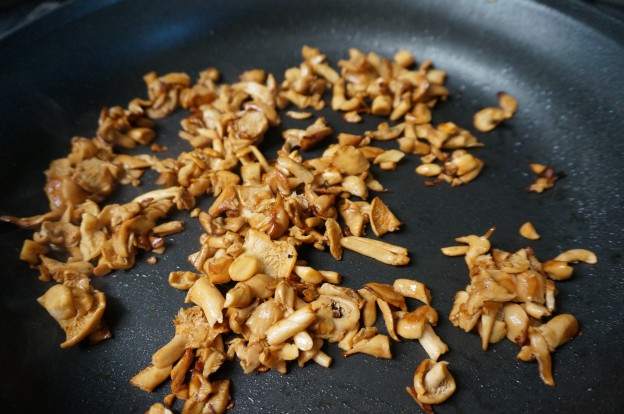
I kept the stems on the mushrooms but cut off the dirt off from the tip. I then rinsed them under water in a colander. Some people will tell you never to wash mushrooms because they soak up all the water and get soggy, but it’s really hard to get off all that dirt if you don’t rinse them in a colander, and if you cook them in the pan long enough all the water will boil off. I heated up a pan on medium heat, added oil, then added the cleaned and roughly chopped hedgehogs.

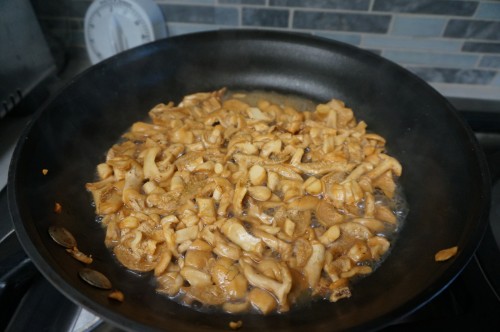
Hedgehogs starting to cook and giving off a lot of water

Hedgehogs starting to cook and giving off a lot of water

Mushrooms are something like 80-90% water, so they will cook down a lot. Good thing I had so many :) It will take a while for all of the water to boil off, but be patient and let them cook for a long time until they start to brown.

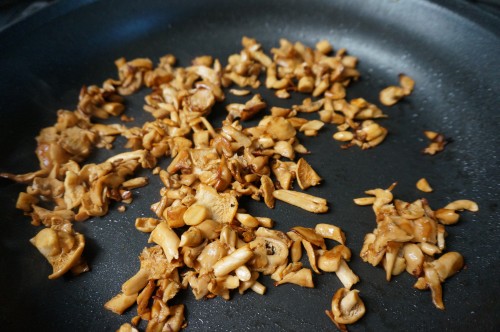
Beautifully browning hedgehogs

Beautifully browning hedgehogs

Kinda crazy how much they cook down, huh? Notice the nice brown color that they are starting to get – keep sautéing them and mixing them with a spatula for a few more minutes. We also chopped up the last of my yellowfoot chanterelles and added those to the mix.

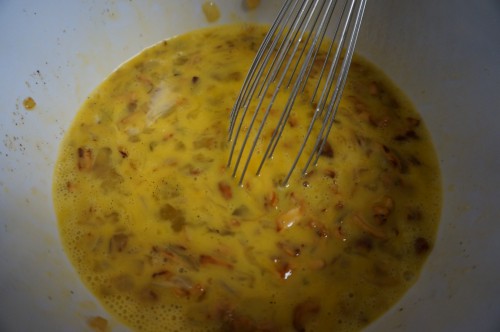
Whisking together the onions, mushrooms, and eggs for the frittata

Whisking together the onions, mushrooms, and eggs for the frittata

I cracked about 10 eggs and added them to a big mixing bowl with the onions and the mushrooms. I mixed well with the whisk, added some salt and pepper, and put the mixture into Lauren’s lovely baking dish.

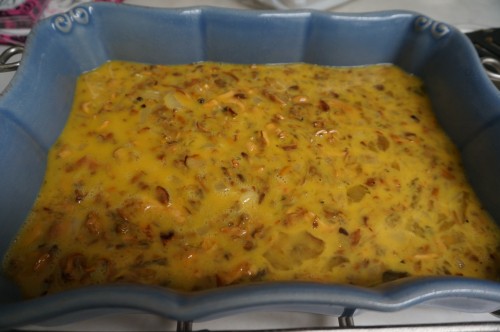
Frittata mixture ready to go into the oven!

Frittata mixture ready to go into the oven!

Baking a frittata is not an exact science. It really depends on the oven and the size of the frittata. I suggest setting the oven to around 400 degrees and checking it every 5-10 minutes. I had preheated Lauren’s oven to 400 degrees prior to cooking, but the frittata took a lot longer to cook than expected. After 10 minutes it was still completely liquid! What can I say, I’m still learning :P I ended up cooking the frittata for about 30 minutes – it was a really big and the baking dish was heavy and thick. There is no rule of thumb as to how long it will take – but expect 10-30 minutes depending on your dish, oven, and the size of the frittata. Luckily, when it finally came out it was beautiful :)

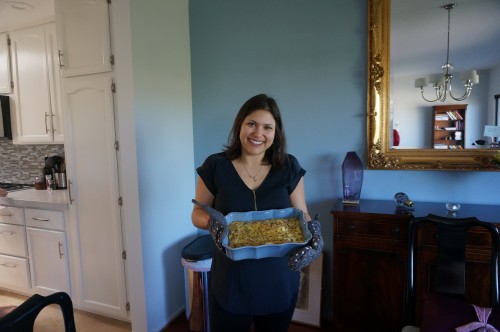
Me showing off my wild mushroom frittata with mushrooms that I foraged myself :)

Me showing off my wild mushroom frittata with mushrooms that I foraged myself :)

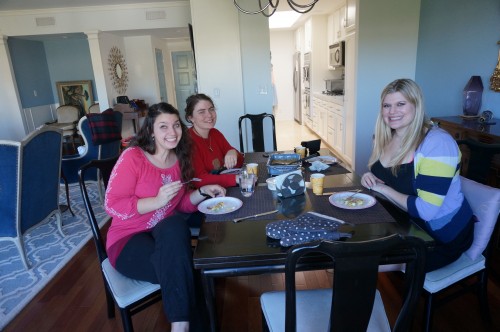
Here are my friends enjoying the frittata in Lauren’s lovely apartment:

Sara, Sarah, and Lauren enjoying the frittata with bagels

Sara, Sarah, and Lauren enjoying the frittata with bagels

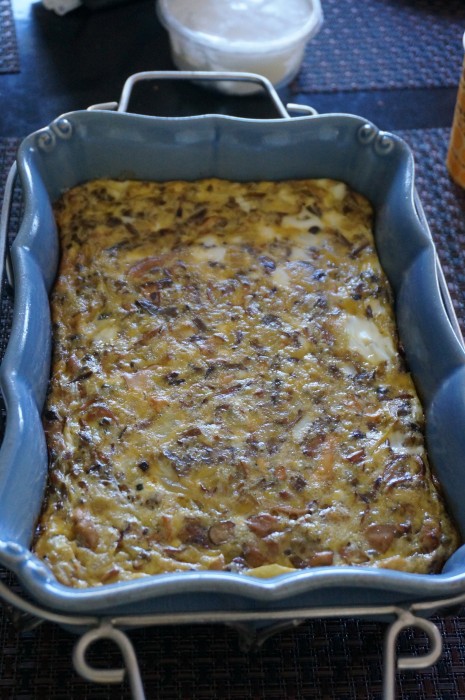
What is better than mushrooms and friends? Not much! Here is a closer look at the gorgeous hedgehog and chanterelle frittata:

Hedgehog and chanterelle wild mushroom frittata

Hedgehog and chanterelle wild mushroom frittata

Fattoush, watermelon salad, and shakshuka Middle Eastern feast

As you know Thursday night I decided to go all out and make a fabulous Middle Eastern feast with Stav, the Israeli graduate student who has been visiting my lab at Berkeley. You’ve already read about the challah and the dessert that we made for the feast, but here I’m going to tell you about all the food that we made while we waited for the challah to rise and the malabi to set.

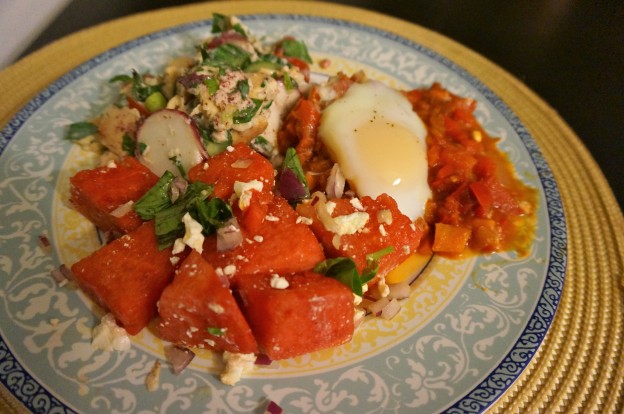
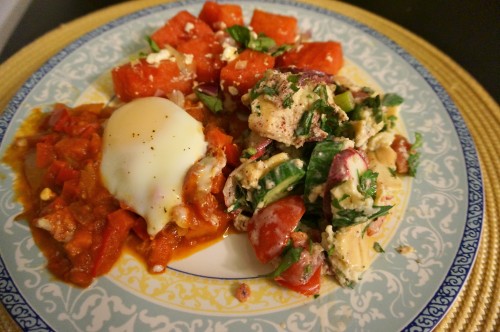
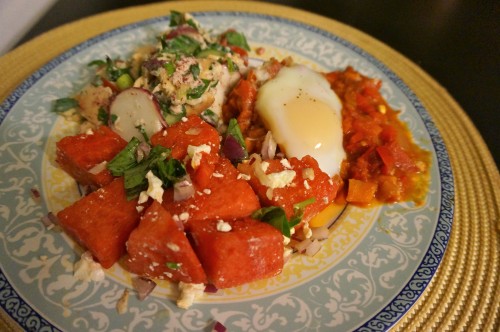
Middle Eastern feast

Middle Eastern feast of shakshuka, fattoush, and watermelon and feta salad

After finishing up work in the lab on Thursday I took Stav to the Berkeley Bowl to buy ingredients for our feast. This was Stav’s first trip to the Berkeley bowl, which was super exciting for me because you know how much I LOVE Berkeley Bowl. I especially love taking people there for the first time and watching them experience its greatness.  If you haven’t been there yet, hit me up and I will take you there. Trust me, you will not be disappointed! It is truly the greatest grocery store that I have ever been to, and no I am not in anyway being paid to say that. Berkeley Bowl has so much amazing produce and especially this time of year with all of the wonderful stone fruit and melons in season, I am easily distracted from my shopping list. Right when we walked in I saw watermelons on sale and I had to have them.  I had made this delightful watermelon and feta salad from Yotam Ottolenghi earlier this summer and felt inspired to make it again.

DSC02446

Na’ama’s fattoush and watermelon and feta salad for a perfect light and healthy meal that captures the flavors of summer super well!

If you are short on time and want to make something that is healthy, flavorful, satisfying, perfectly captures the flavors of summer, and involves no cooking whatsoever, make Ottolenghi’s fattoush and watermelon and feta salad. If you haven’t tried mixing sweet juicy watermelon with salty feta and fresh basil for this delicious savory salad, go out and make it right now while it is in season and you still have the chance. I promise you will not regret it!

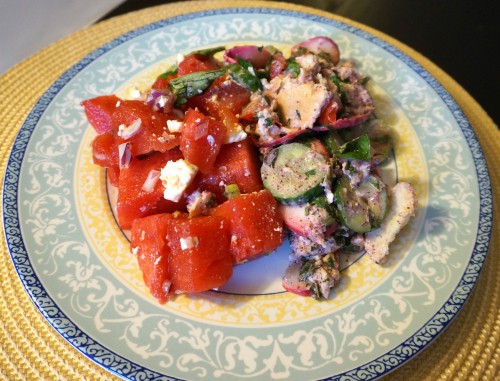
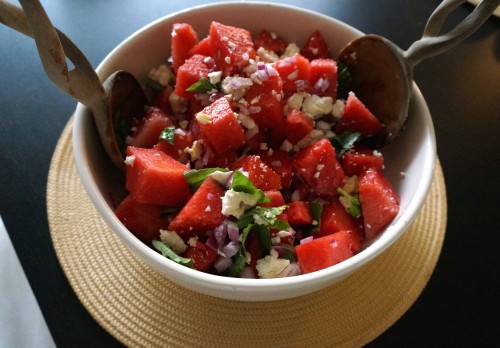
Watermelon and feta salad with basil and olive oil

Watermelon and feta salad with basil and olive oil

The watermelon salad is so simple and easy you don’t even have to measure anything out. Just chop up a watermelon, tear up some basil, thinly slice some red onion, crumble up some feta, and add a dash of olive oil and mix it all together. I swear Ottolenghi is a flavor genius coming up with this stuff. Feta and watermelon is truly a winning combination but adding the basil and the red onion and olive oil is nothing short of magic. You may think I’m being hyperbolic here but really it is such a great fresh summery salad.

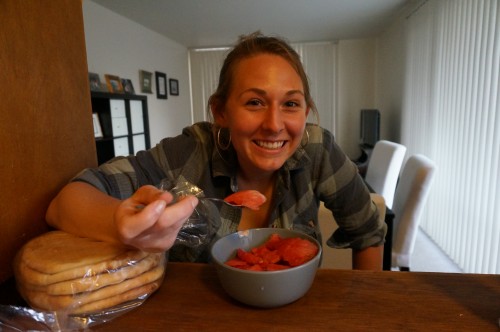
Claire enjoying some watermelon while I make the fattoush

Claire enjoying some watermelon while I make the fattoush

After getting side tracked with the unplanned but oh so delicious watermelon salad, I made my favorite fattoush salad from Ottolenghi’s Jerusalem which I’ve featured in a previous post.   This is another dish that I just can’t get enough of. The fattoush and watermelon salad went together really well and just screamed summer. Our plates were bursting with flavorful fresh herbs, juicy tomatoes and watermelon, and delicious pita with creamy buttermilk. Everything tasted so healthy and light but incredibly satisfying.

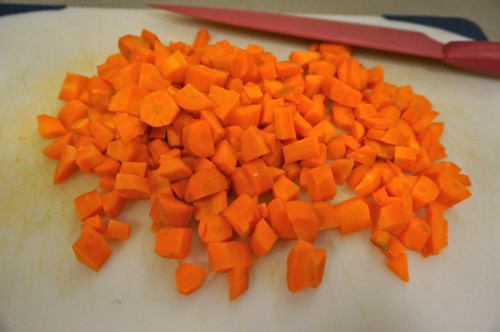
Chopped up carrots from my CSA box for the shakshuka

Chopped up carrots from my CSA box for the shakshuka

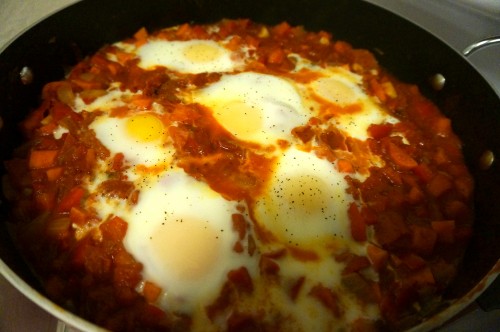
After we made the fattoush and watermelon and feta salad, we got started on the shakshuka, which is an Israeli egg dish with a base of tomatoes and red peppers. Tom and I ate it every morning at the breakfast buffet at our hotel in Israel, but you can also eat it for lunch or dinner. I was intimidated at first to make shakshuka because it sounds so fancy and exotic, but Stav made it seem simple and said that you can pretty much throw any vegetable that you have wilting in your fridge into it. It is the Israeli version of everything but the kitchen sink! stew. Traditional shakshuka starts with a base of tomatoes and red peppers, but you can get creative with it from there. We chopped up onions and garlic sauteed them in oil until soft. We cleaned and chopped up 2 red peppers and a small red chile pepper and added those to the onions and garlic. I had some semi soft carrots in my fridge left over from my CSA basket from the week before so we chopped up those and added them in.  I had a can of whole peeeled tomatoes left over from a soup I had made over the weekend, so we cut up those along with 3 fresh tomatoes and added those to the pan. We set the heat on high and let the vegetables cook for 10-15 minutes.

Here's what it looks like to make a hole in the vegetable sauce and plant a whole egg in it

Here’s what it looks like to make a hole in the vegetable sauce and plant a whole egg in it

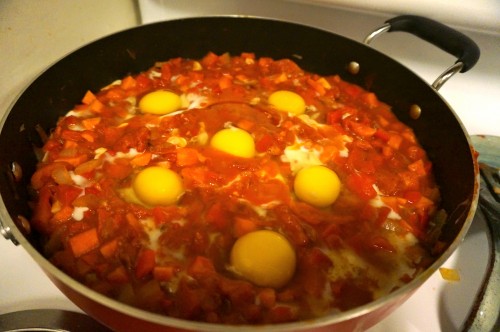
Once the vegetables were cooked, we added a small can of tomato paste, some cumin, paprika, and some red zhoug which is a spice mixture based on chiles and coriander and garlic that I bought in Israel. You can add any sort of spicy spice at this point- I happened to have zhoug which we added or you could add harissa or if you just have chile flakes that would work too. Let this simmer for another 5-10 minutes and add some salt and pepper. Once the sauce it cooked, make little holes with a spoon and break a whole egg in it. Then put the heat on low and cover and let cook for 10 minutes.

Shakshuka with the eggs cooking

Shakshuka with a tomato, red pepper, chile pepper, and carrot base and eggs simmering

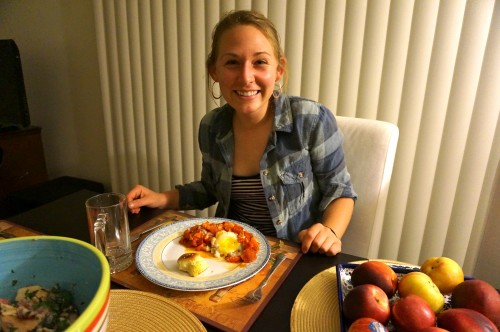
Shakshuka goes great with pita or challah and can also be accompanied by an Israeli cheese called labneh or plain Greek yogurt. It was spicy and savory and the eggs came out perfect. Claire, another one of my graduate student friends, who I went on this awesome trip to the redwoods with, came over to join us for our feast after spending hours washing redwood roots in the lab. The three of us were practically shrieking with delight while eating the fantastic fresh tasting fattoush and watermelon salads which went really well with the shakshuka. The challah that we had baked was delicious dipped into the shakshuka. All in all, it was a successful fun filled evening filled with delicious food and wonderful fungi loving ladies.

Claire looking super stoked to be eating the shakshuka

Claire looking super stoked to be eating the shakshuka

DSC02408

Fattoush, watermelon salad, and shakshuka Middle Eastern feast

Chard cakes with sorrel sauce

These chard cakes are the perfect vaguely healthy yet super decadent summer appetizer or side dish.  They are seriously so good is difficult to describe. It’s this odd sensation of something super healthy and good for you like chard, and then made a little bit sinful by deep frying it, but then it’s covered in this really fresh and light tasting sorrel sauce.  The recipe for the chard cakes is on p. 149 of Yotam Ottolenghi’s Plenty and is also featured online here.

This is how much I love swiss chard

This is how much I love swiss chard

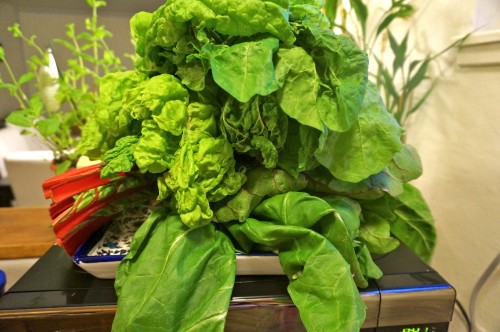
I don’t think I’d ever cooked with swiss chard before starting this blog, but now I’ve cooked at least 4 recipes featuring it. It is just so good the way that Yotam Ottolenghi suggests making it, and it is especially well complemented by Greek yogurt, which I think has been a key ingredient in every swiss chard recipe I’ve made so far (I especially really loved the swiss chard with tahini, yogurt, and buttered pine nuts, featured here).

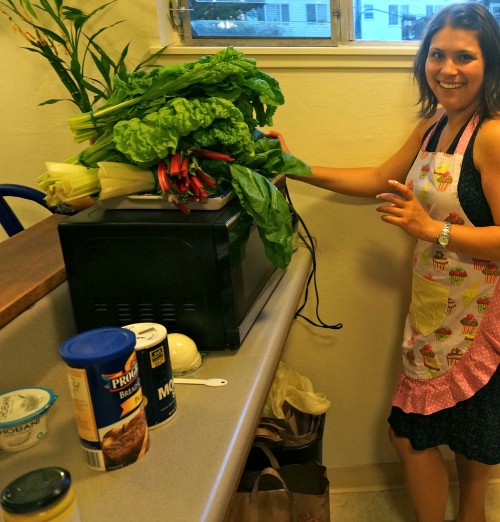
Here I am contending with my mountain of swiss chard

Here I am contending with my mountain of swiss chard

Unfortunately it’s summer and dry as a bone, so I don’t have any mushrooms or a mushroom lesson for you today, but I made this recipe for the first time with my friend Rachel, who is a fellow microbial ecologist and has started a blog herself teaching people about microbes – so check it out if you want to learn some microbial ecology :)

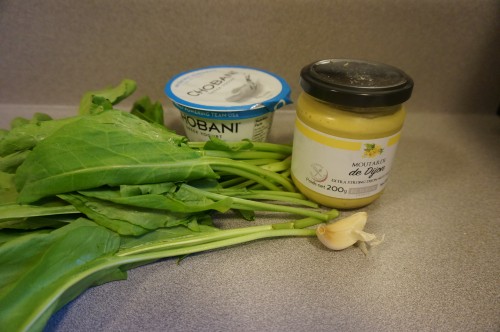
Ingredients for the sorrel sauce - Sorrel, garlic, greek yogurt, dijon mustard

Ingredients for the sorrel sauce – sorrel, garlic, Greek yogurt, dijon mustard

As for the chard cakes, the first step is to make the sorrel sauce, which requires either a food processor or a blender. I used a food blender while making it at Rachel’s house and I used an immersion blender when I made it again at home. Personally I think the immersion blender was a bit easier but either works. Make sure to start boiling the water for blanching the Swiss chard while making the sauce because the sauce doesn’t take that long to make and you might get hungry while waiting for the water to boil!

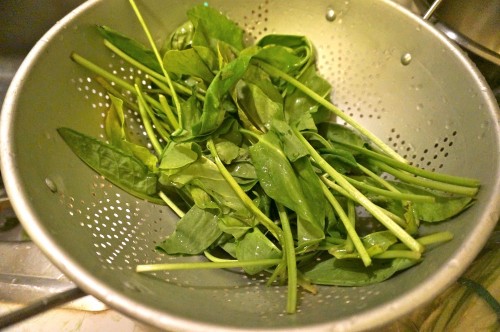
Sorrel leaves

Sorrel leaves

I don’t think I’ve ever cooked with sorrel in my life before! It grows wild all over California and my other friend Rachael, who I took mushroom hunting with me in Point Reyes, was pointing out and collecting the wild sorrel growing along the trails. Next time I will have to collect it myself in the woods, but this time I bought it from the Berkeley bowl.  Blend the sorrel leaves, Greek yogurt, garlic clove, olive oil, and Dijon mustard until smooth.

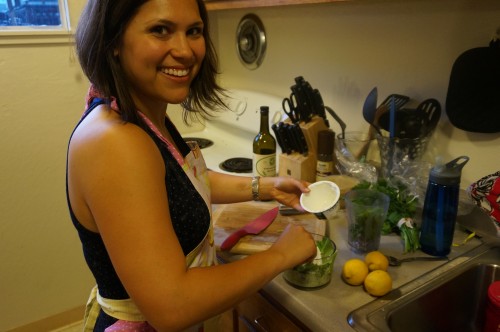
Mixing together ingredients for the sorrel sauce

Mixing together ingredients for the sorrel sauce

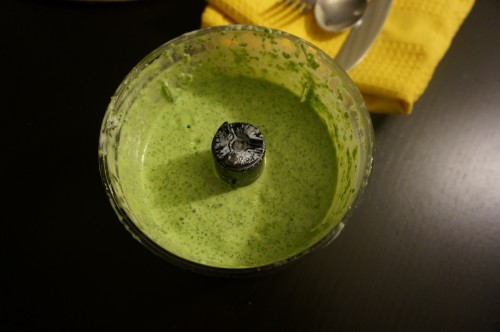
It makes a beautiful bright green sauce that I will have to find other uses for this week since we had a lot of extra! I think it would be good on cous cous or steak and would probably go well with grilled porcinis :)

Sorrel sauce in the immersion blender

Sorrel sauce in the immersion blender

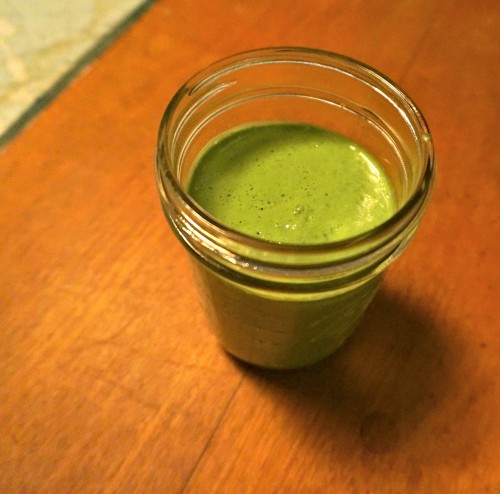
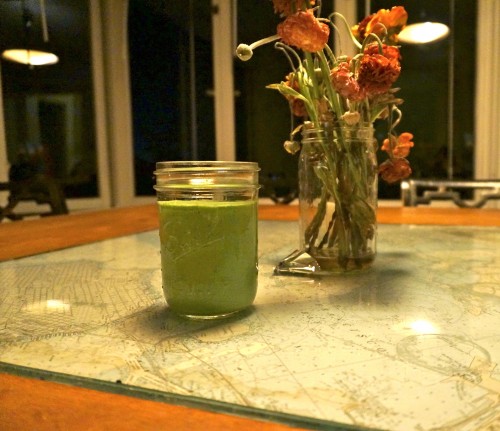
I felt like I would totally fit in with all of the Berkeley and Oakland hipsters when Rachel gave me a mason jar to store the sorrel sauce in:
sorrelsauceinmasonjar

Sorrel sauce

Isn’t it beautifully bright green?

Sorrel sauce in mason jar

Sorrel sauce in mason jar

After the sauce is made the next step is to blanch the swiss chard. While the swiss chard is blanching, sautee pine nuts in oil. This is another repetitive theme in the Ottolenghi books and it is delicious! Pine nuts add such a nice decadent crunch to all of these dishes and they are so good toasted!

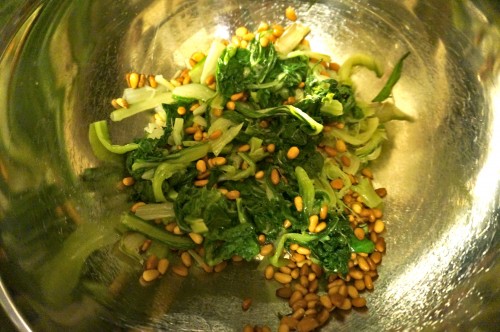
Blanched swiss chard with toasted pine nuts

Blanched swiss chard with toasted pine nuts

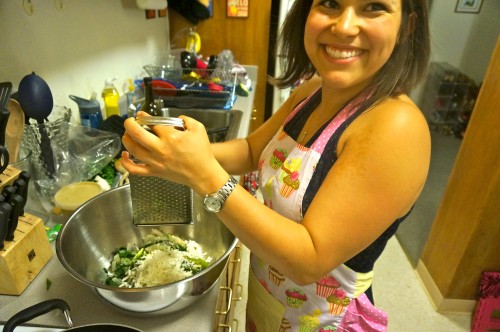
Next add the egg, bread crumbs, salt, pepper, and cheese. I had no idea where to find kashkaval cheese but a quick google for substitutions on my iphone while at the grocery store found me mozzarella. Rachel, who has made the recipe before and said she went out of her way to find kashkaval cheese at a specialty cheese shop, said it tasted way better with mozzarella. The mozzarella was creamy and stringy which held together the cakes very well. Then came the fun part – mixing everything together and molding the cakes with my hands! While mixing the cakes we started heating up canola oil in a pan.

Adding the mozzarella cheese

Adding the mozzarella cheese

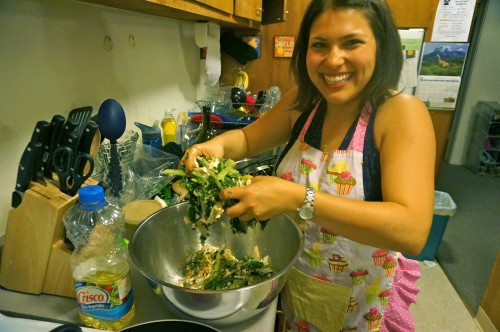
Mixing up the chard cakes

Mixing up the chard cakes

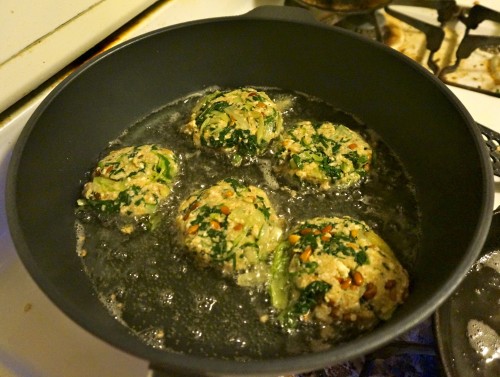
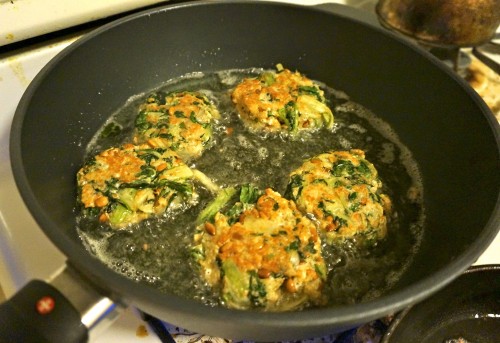
Once the oil was hot we fried the cakes in the oil for 2-3 minutes on each side. This was pretty much my first time frying anything!

swiss chard cakes frying in oil

swiss chard cakes frying in oil

Don’t they look pretty when they start to brown?

Swiss chard cakes browning

Swiss chard cakes browning

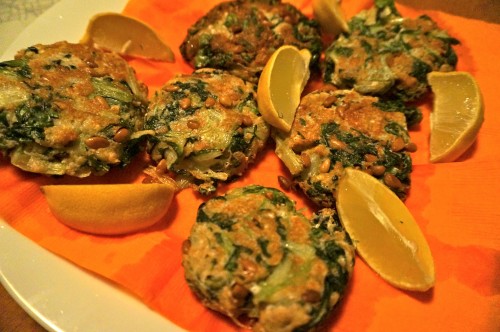
Rachel didn’t have any paper towels but she did have leftover napkins from Halloween which we put to good use!

Chard cakes with lemon wedges and halloween napkins

Chard cakes with lemon wedges and halloween napkins

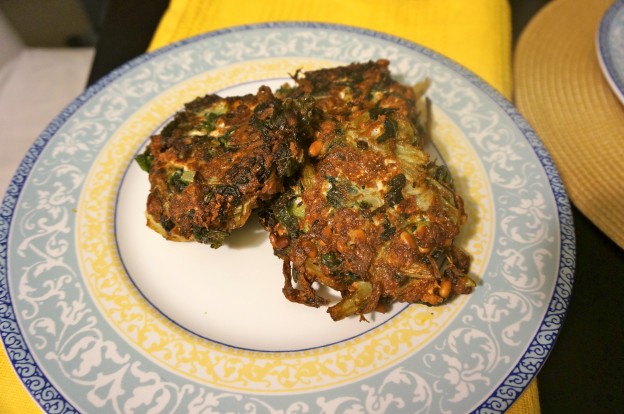
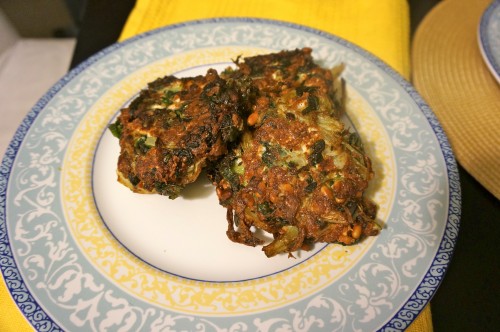
These cakes tasted super decadent and delicious. They were satisfying and surprisingly not that unhealthy tasting given they were fried in oil.

Chard cakes fried to perfection

Chard cakes fried to perfection

You have to make them yourself. Seriously, just go do it. You won’t regret it! Here is the ingredient list to help you out :)

Sorrel sauce:

  • 3 cups sorrel leaves, washed
  • 1/2 cup Greek yogurt
  • 1 garlic clove, crushed
  • 2 tbsp olive oil
  • 1/2 tsp Dijon mustard
  • salt

Cakes:

  • 1.25 lbs Swiss chard
  • 1/3 cup pine nuts
  • 1 tbsp olive oil
  • 4 oz kashkaval cheese, coarsely grated (I used mozzarella)
  • 1 egg
  • 6 tbsp dried white breadcrumbs
  • 1/4 tsp salt
  • black pepper
  • vegetable oil for frying

Chickpea saute with Greek yogurt and couscous with tomato and onion

Ok, so yes, I know you are thinking – why is this girl calling herself fungi foodie when all she cooks is middle eastern food? Well guess what everybody – it’s been raining! A lot! In Berkeley! So I’m going to go mushroom hunting this weekend :) So with any luck I will have a delicious wild mushroom recipe for next week! Yay for wild mushrooms :)

But in the meanwhile, I’m continuing on my theme of cooking healthy, delicious vegetarian recipes from Jerusalem and Plenty. This week, I cooked the chickpea saute with Greek yogurt from pg. 211 Plenty and featured online here and the couscous with tomato and onion from pg 129 of Jerusalem and featured online here.

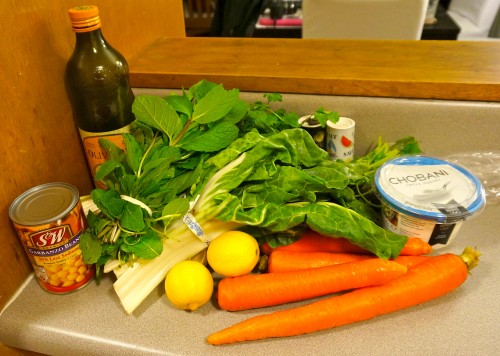
These dishes were on the less complicated side for Yotam Ottolenghi and my trip to Berkeley Bowl for groceries was one of the easiest and shortest trips yet! Either I’m getting much better at this whole grocery shopping thing or I am indeed choosing simpler recipes :P Here are all of the lovely fresh ingredients for the chickpea saute – look at all those fresh herbs and veggies! I really need to consider getting some potted herbs!

Ingredients for the chick pea saute

Ingredients for the chick pea saute

The first step is to separate the green part from the stalks of the chards – I’m totally falling for this stuff! It’s so pretty!

Swiss chard centers

Swiss chard centers

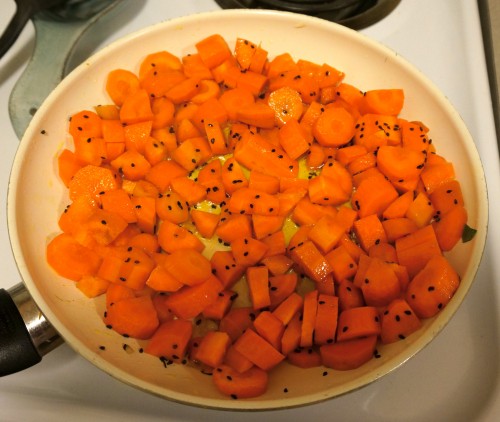
So you blanch the chard stalks for 3 minutes in boiling water, then add the greens and blanch them for 2 more minutes, then remove from boiling water, rinse in cold water, and drain.  Then you heat up 1/3 cup olive oil in a pan – Dan was appalled at this amount of oil – but I reminded him that olive oil is good for you :) He remained unconvinced but I decided to stick to Ottolenghi’s guidelines despite Dan’s rumblings. So you peel and chop up the carrots and saute them in the olive oil, then add caraway seeds. I’d never used caraway seeds before cooking from these books but they are such a good spice! I bought them super cheap from the bulk spice section at Berkeley Bowl and I’m totally hooked.

carrots sauteeing in olive oil with caraway seeds

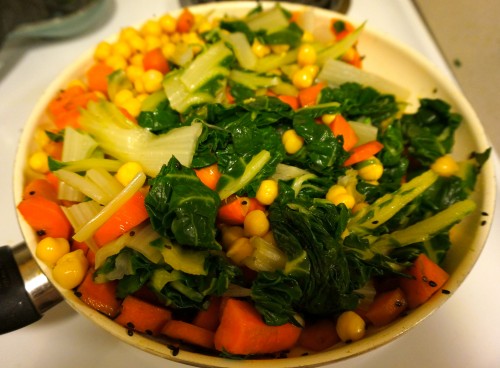
So after the carrots are cooked, add the blanched chard back in, add in the chick peas (yes I used canned – perhaps a faux pas but after the disaster of trying to cook fava beans from scratch, I’m sticking to canned. It’s just so much easier!), add in garlic and fresh mint and parsley.

carrots with swiss chard, chicken peas, garlic, and herbs

carrots with swiss chard, chicken peas, garlic, and herbs

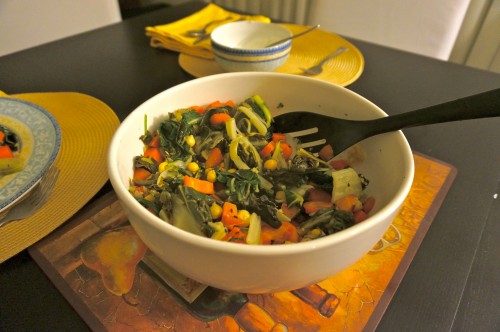
Look at this ginormous bowl of vegetables!

Chick pea saute

Chick pea saute

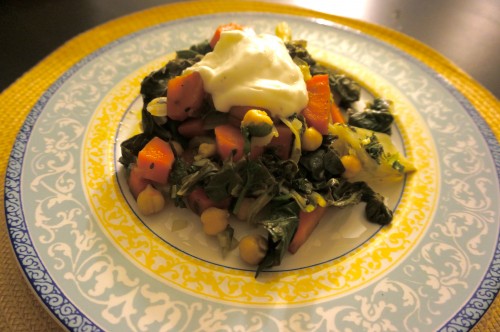
But  the finishing touch that really completes the dish is adding the Greek yogurt sauce on top. It just makes it so much tastier! And it adds a ton of calcium and protein – win-win :)

The greek yogurt on top really takes it up a notch!

The greek yogurt on top really takes it up a notch!


chick pea saute with greek yogurt

chick pea saute with greek yogurt

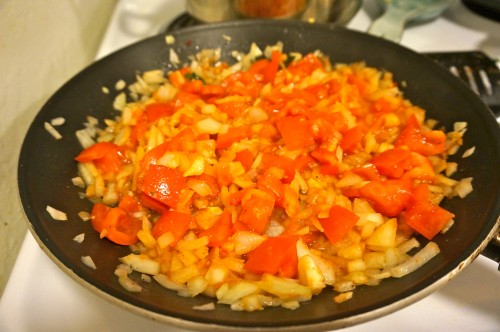
So to accompany the delicious and healthy chickpea saute we made some couscous with tomatoes and onions.  The first step is to dice and sautee an onion, then add sugar and tomato puree. Then dice two tomatoes (I added 3 because I love tomatoes!) and add them to the pan.

sauteed onions with tomatoes

sauteed onions with tomatoes

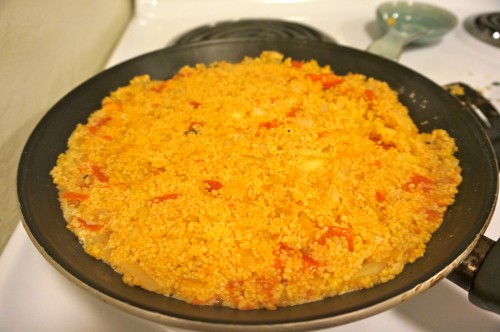
In the meanwhile, add boiling vegetable stock to some couscous and leave it to sit in a bowl covered in cling wrap for 10 minutes. Once the couscous is cooked, then you mix in the tomato and onion mixture and wipe off the pan and add some butter to it. The next part gets a little bit complicated…at least for a novice like me….making the couscous crispy was no easy task! You are supposed to add butter then put the couscous back in the pan and cover it and let it steam for 12 minutes. Well, I did this and it was not quite crispy. Probably I should have let it steam for longer but we were hungry so I decided to just go for it…What followed was an EPIC FAIL where I flipped the couscous onto a dish and some of it landed on the floor but luckily most of it made it to the dish! I think I need to buy bigger dishes….

cous cous with tomatoes and onions

cous cous with tomatoes and onions

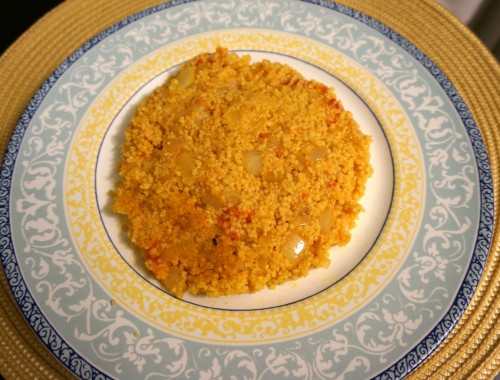
Ottolenghi has an amazing way with making vegetarian dishes that are completely satisfying and don’t make you miss meat one bit. These dishes are healthy, relatively cheap and easy, and super flavorful and fulfilling. The only complicated step that I utterly failed at was getting the couscous crispy and then flipping it over “expertly” onto a dish –  so I did not manage to get that beautiful crispy crust that they claimed makes this dish. I still think it tasted amazing, but I think I will have to practice some more with the crisping and flipping..Here is my couscous with a corner of it looking crispy…it still tasted really good without the crispy crust but I will definitely need to practice with this one..

couscous with tomatoes and onion

couscous with tomatoes and onion

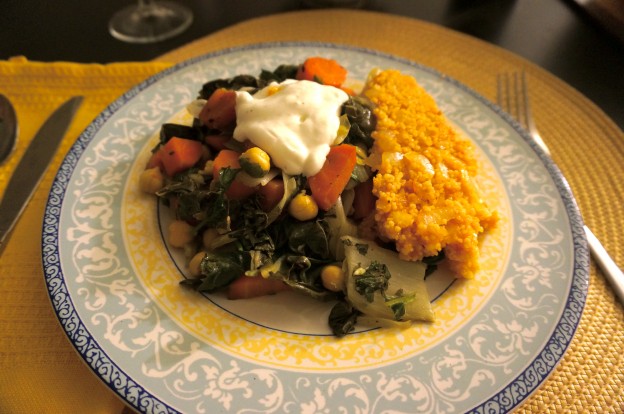
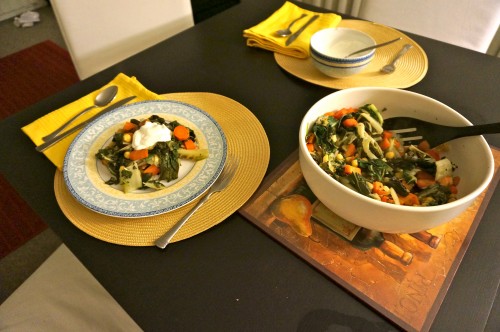
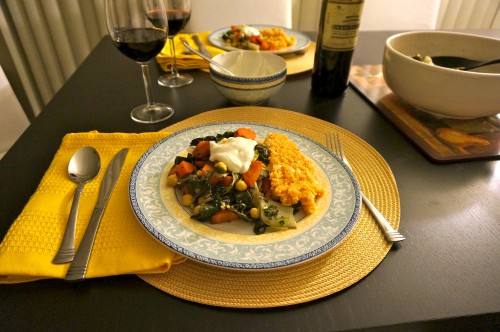
Here is my completed meal :) It was a totally satisfying, healthy, flavorful, and fulfilling vegetarian middle eastern inspired meal. Thanks Ottolenghi for two more great dishes :)

Bon apetit! Healthy vegetarian mediterranean inspired meal!

Bon apetit! Healthy vegetarian mediterranean inspired meal!