Author Archives: fungifoodie

Black trumpet, hedgehog, and chanterelle wild mushroom risotto

Last weekend I went mushroom hunting in Mendocino with the UC Berkeley, UC Davis, and SF State mycology classes. It was AWESOME. The mushrooms were out in abundance. After such a dry and disappointing mushroom hunting season last year, I was stoked to say the least.

Yay for mushrooms!!!

Yay for mushrooms!!!

I was so excited to finally find mushrooms after so much terrible dry weather things got a little extreme…

Me with the mushroom-fever-crazy-eyes

Me with the mushroom-fever-crazy-eyes

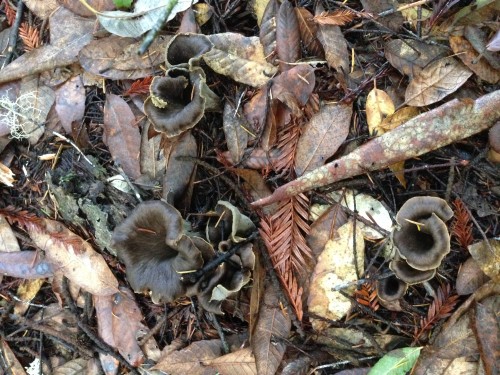
I found black trumpets (Craterellus cornucopioides) for the first time ever! They really blend in with the redwood duff so it is hard to find them:

Can you see the black trumpet mushrooms in this photo?

Can you see the black trumpet mushrooms in this photo?

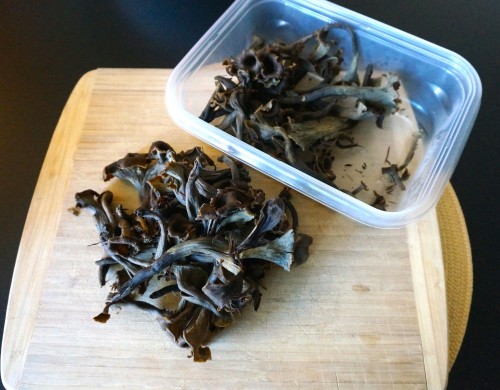
I climbed up a super steep slope to find these but it was totally worth it :) I’ve never collected these mushrooms before and I got a pretty good amount of them:

Black trumpet mushrooms that I collected from the redwood tanoak forests in Mendocino

Black trumpet mushrooms that I collected from the redwood tanoak forests in Mendocino

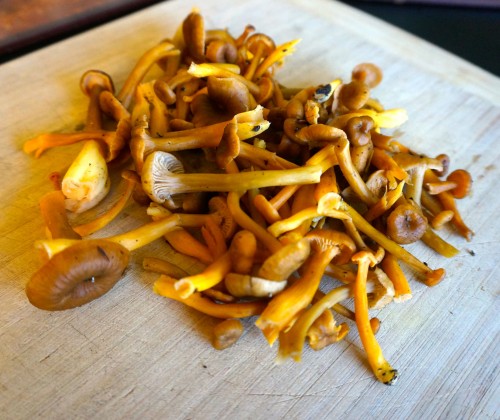
In addition to black trumpets and oak and golden chanterelles (Cantharellus californicus and formosus), I found a bunch of yellow foot chanterelles (Craterellus tubaeformis), which were out very early this year. Usually, they don’t start coming out until December or January, but I’m not complaining!

yellowfoot AKA winter chanterelles

yellowfoot AKA winter chanterelles

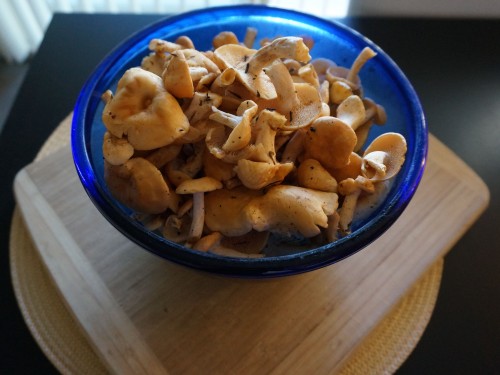
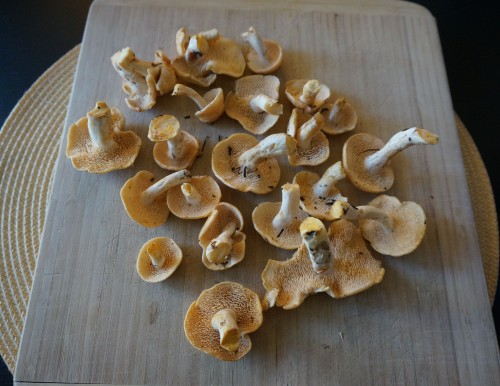
The mushrooms that I found in the greatest abundance were hedgehog mushrooms (Hydnum umbilicatum). I’ve never found so many in my life.

Bowl of hedgehog bounty

Bowl of hedgehog bounty

These are a really good edible, so I was very excited to find so many! They are also a good mushroom for an amateur since they are very difficult to misidentify. They call them the hedgehog mushroom because instead of gills they have teeth. Can you see the teeth in this photo?

Can you see the teeth? That's why they call it the hedgehog

Can you see the teeth? That’s why they call it the hedgehog

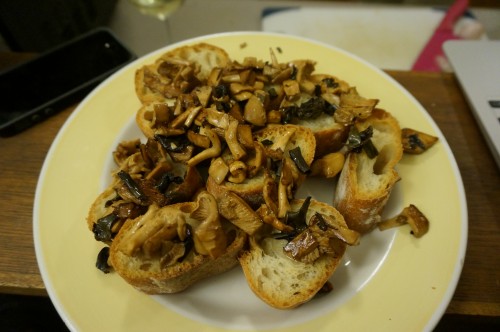
With all of my beautiful mushrooms, I decided to invite over some friends and make a wild mushroom risotto. I sauteéd up some of the chanterelles, hedgehogs, and black trumpets in olive oil and put them on baguette toasts for everyone to eat as an appetizer while the risotto was cooking.

wild mushrooms (chanterelles, hedgehogs, black trumpets) on toast

Wild mushrooms (chanterelles, hedgehogs, black trumpets) on toast

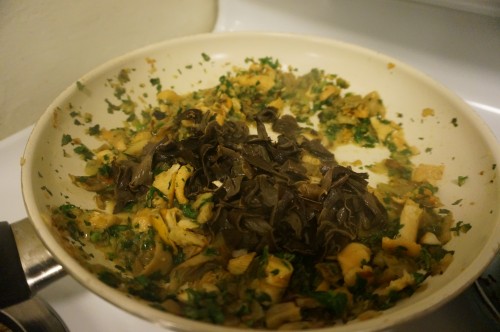
I have only cooked risotto once or twice before, so I turned to Google for help with finding a recipe. I decided to base my recipe of off this mushroom risotto. Risotto is actually rather easy to make. All you need to do is sauté up some onions and garlic and whatever vegetables you like, then add 1 cup of arborio rice, and slowly add liquids while stirring continuously. Whether you decide to add milk, cream, vegetable or chicken stock is completely up to you! I started out with sautéing 3-4 chopped shallots and a few cloves of garlic in oil. I added a bit of minced celery, chopped parsley, salt, and pepper. Then I added a bunch of hedgehogs, black trumpets, and golden chanterelles to the pan. I used a lot more mushrooms than was recommended, but in my opinion they are the best part :)

Shallots, garlic, parsley, celery, hedgehogs, chanterelles, and black trumpets sauteeing

Shallots, garlic, parsley, celery, hedgehogs, chanterelles, and black trumpets sautéing

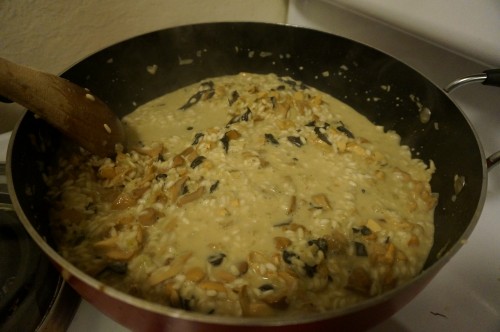
After the mushrooms are sautéed, you add milk and cream to the mixture. I decided to increase the size of the recipe to make sure I had enough risotto for all of my friends, so I added 1.5 cups of milk and 3/8 cups heavy cream. The recipe called for whole milk but I found that skim milk still made a very creamy and delicious risotto and was slightly healthier – but you can use whatever you’d like! Next I added 1.5 cups of arborio rice.  After adding the rice you start to add stock/broth one cup at a time. I used vegetable broth because one of my friends is a vegetarian, but you can use whatever kind of stock you want. This is what the risotto looks like when you first start to cook it:

risotto cooking

Risotto cooking

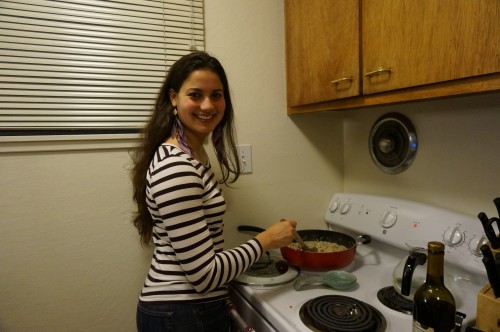
Risotto requires a lot of stirring. I’m talking like 25-45 minutes of non-stop stirring. You are supposed to stir continuously and add the broth one cup at a time as it absorbs. There is no magic number for how long it takes, you just cook it until it’s done. Make sure you invite a lot of friends over to help you stir :)

Meera being a good friend and helping me stir the risotto

Meera being a good friend and helping me stir the risotto

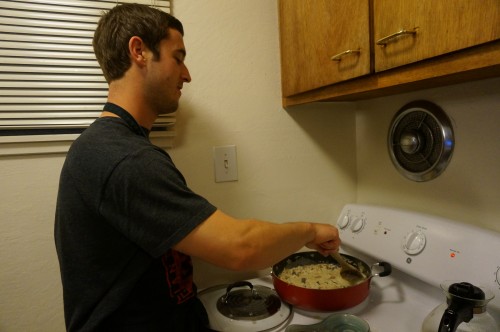
Stirring is tiring stuff. Patrick takes over the stirring for a while.

Stirring is tiring stuff. Patrick takes over the stirring for a while.

Taste test the risotto to tell if it’s done cooking. It should be creamy but still a little bit al dente. This recipe took about 4 cups of vegetable broth and 45 minutes of stirring. At this point, we added the cheese. The recipe calls for grated Parmesan – we decided to use a mix of Parmesan Stravecchio and Reggiano. I skipped adding the butter because I thought it was rich enough.

Finally the stirring is done!

Finally, the stirring is done!

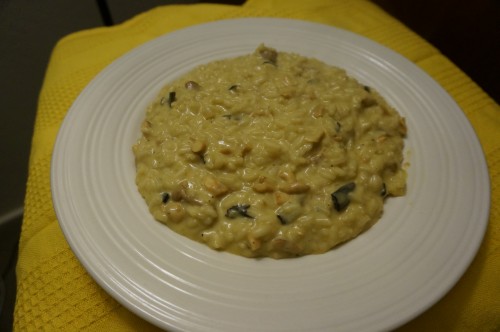
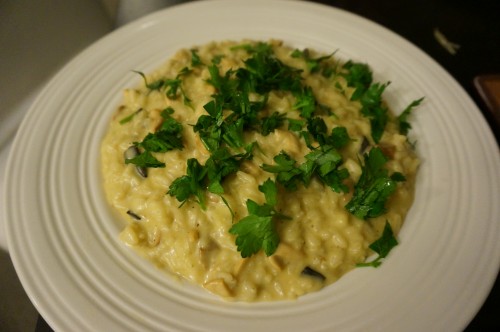
I was concerned my risotto looked a bit drab but luckily Kari was there to suggest that I sprinkle parsley on top to color it up. It worked beautifully :)

Wild mushroom risotto with parsley sprinkled on top

Wild mushroom risotto with parsley sprinkled on top

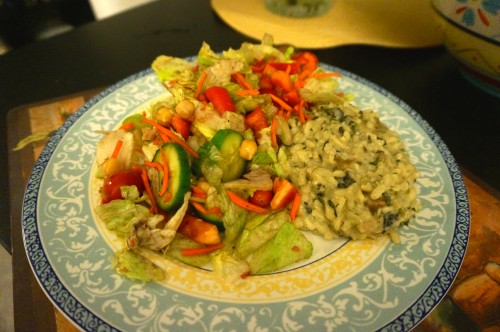
I served the risotto with a giant vegetable salad. It was a nice light accompaniment to the rich risotto and made us feel slightly healthier :)

wild mushroom risotto served with salad

Wild mushroom risotto served with salad

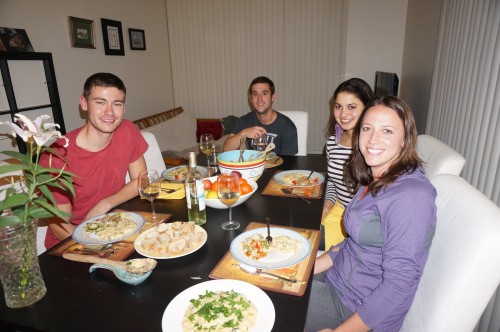
And of course the most important part of any meal is having good friends to share it with! Thanks to all my friends who came over and helped me cook this delicious wild mushroom feast!

Gavin, Patrick, Meera, and Kari helping me eat the risotto

Gavin, Patrick, Meera, and Kari helping me eat the risotto

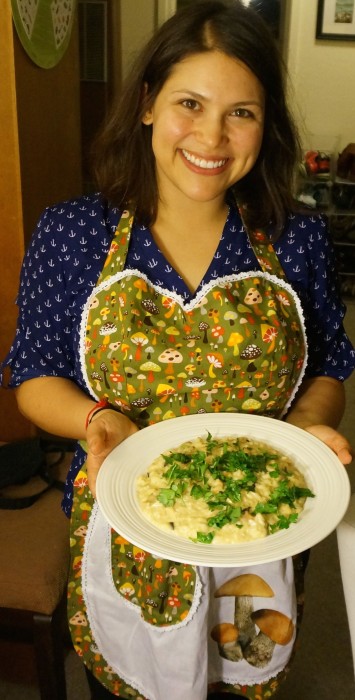
Bon appétit!

Me showing off my wild mushroom risotto and my awesome mushroom apron

Me showing off my wild mushroom risotto and my awesome mushroom apron


Ingredient list (to make 5 generous servings):

  • 4 shallots
  • 3 garlic cloves
  • 0.5 cup parsley
  • 1 celery stalk
  • salt and pepper to taste
  • 4 cups vegetable or chicken stock
  • 1.5 cups skim or whole milk
  • 3/8 cup heavy cream
  • 1.5 cups arborio rice
  • 1-2 cups grated cheese of your choice (Parmesan-like)

Fattoush, watermelon salad, and shakshuka Middle Eastern feast

As you know Thursday night I decided to go all out and make a fabulous Middle Eastern feast with Stav, the Israeli graduate student who has been visiting my lab at Berkeley. You’ve already read about the challah and the dessert that we made for the feast, but here I’m going to tell you about all the food that we made while we waited for the challah to rise and the malabi to set.

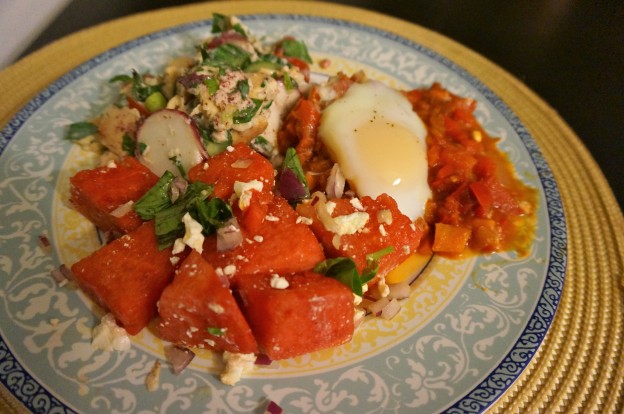
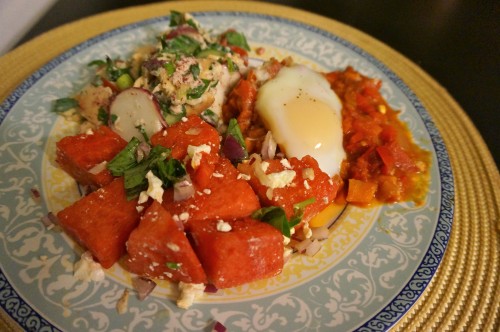
Middle Eastern feast

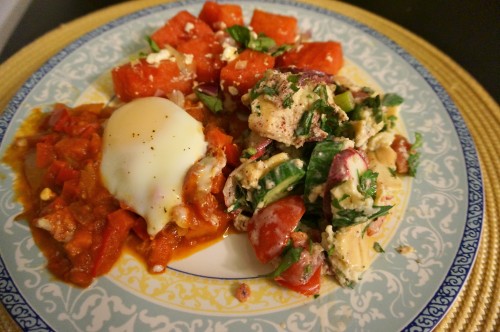
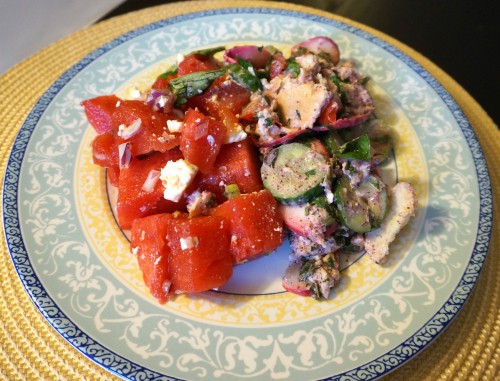
Middle Eastern feast of shakshuka, fattoush, and watermelon and feta salad

After finishing up work in the lab on Thursday I took Stav to the Berkeley Bowl to buy ingredients for our feast. This was Stav’s first trip to the Berkeley bowl, which was super exciting for me because you know how much I LOVE Berkeley Bowl. I especially love taking people there for the first time and watching them experience its greatness.  If you haven’t been there yet, hit me up and I will take you there. Trust me, you will not be disappointed! It is truly the greatest grocery store that I have ever been to, and no I am not in anyway being paid to say that. Berkeley Bowl has so much amazing produce and especially this time of year with all of the wonderful stone fruit and melons in season, I am easily distracted from my shopping list. Right when we walked in I saw watermelons on sale and I had to have them.  I had made this delightful watermelon and feta salad from Yotam Ottolenghi earlier this summer and felt inspired to make it again.

DSC02446

Na’ama’s fattoush and watermelon and feta salad for a perfect light and healthy meal that captures the flavors of summer super well!

If you are short on time and want to make something that is healthy, flavorful, satisfying, perfectly captures the flavors of summer, and involves no cooking whatsoever, make Ottolenghi’s fattoush and watermelon and feta salad. If you haven’t tried mixing sweet juicy watermelon with salty feta and fresh basil for this delicious savory salad, go out and make it right now while it is in season and you still have the chance. I promise you will not regret it!

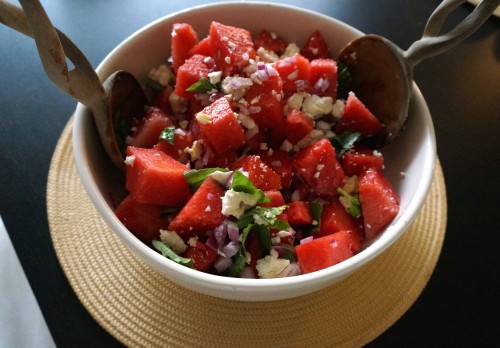
Watermelon and feta salad with basil and olive oil

Watermelon and feta salad with basil and olive oil

The watermelon salad is so simple and easy you don’t even have to measure anything out. Just chop up a watermelon, tear up some basil, thinly slice some red onion, crumble up some feta, and add a dash of olive oil and mix it all together. I swear Ottolenghi is a flavor genius coming up with this stuff. Feta and watermelon is truly a winning combination but adding the basil and the red onion and olive oil is nothing short of magic. You may think I’m being hyperbolic here but really it is such a great fresh summery salad.

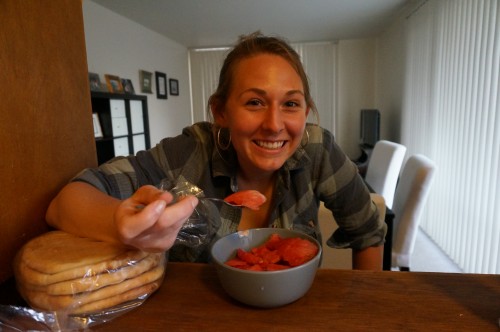
Claire enjoying some watermelon while I make the fattoush

Claire enjoying some watermelon while I make the fattoush

After getting side tracked with the unplanned but oh so delicious watermelon salad, I made my favorite fattoush salad from Ottolenghi’s Jerusalem which I’ve featured in a previous post.   This is another dish that I just can’t get enough of. The fattoush and watermelon salad went together really well and just screamed summer. Our plates were bursting with flavorful fresh herbs, juicy tomatoes and watermelon, and delicious pita with creamy buttermilk. Everything tasted so healthy and light but incredibly satisfying.

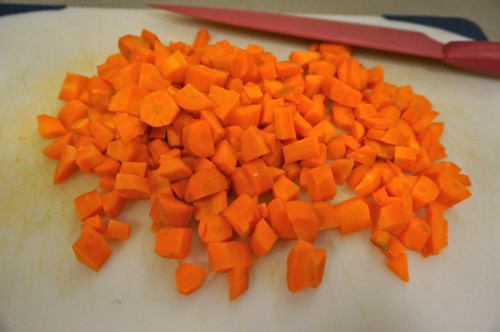
Chopped up carrots from my CSA box for the shakshuka

Chopped up carrots from my CSA box for the shakshuka

After we made the fattoush and watermelon and feta salad, we got started on the shakshuka, which is an Israeli egg dish with a base of tomatoes and red peppers. Tom and I ate it every morning at the breakfast buffet at our hotel in Israel, but you can also eat it for lunch or dinner. I was intimidated at first to make shakshuka because it sounds so fancy and exotic, but Stav made it seem simple and said that you can pretty much throw any vegetable that you have wilting in your fridge into it. It is the Israeli version of everything but the kitchen sink! stew. Traditional shakshuka starts with a base of tomatoes and red peppers, but you can get creative with it from there. We chopped up onions and garlic sauteed them in oil until soft. We cleaned and chopped up 2 red peppers and a small red chile pepper and added those to the onions and garlic. I had some semi soft carrots in my fridge left over from my CSA basket from the week before so we chopped up those and added them in.  I had a can of whole peeeled tomatoes left over from a soup I had made over the weekend, so we cut up those along with 3 fresh tomatoes and added those to the pan. We set the heat on high and let the vegetables cook for 10-15 minutes.

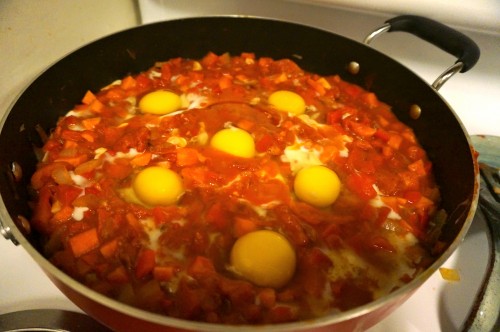
Here's what it looks like to make a hole in the vegetable sauce and plant a whole egg in it

Here’s what it looks like to make a hole in the vegetable sauce and plant a whole egg in it

Once the vegetables were cooked, we added a small can of tomato paste, some cumin, paprika, and some red zhoug which is a spice mixture based on chiles and coriander and garlic that I bought in Israel. You can add any sort of spicy spice at this point- I happened to have zhoug which we added or you could add harissa or if you just have chile flakes that would work too. Let this simmer for another 5-10 minutes and add some salt and pepper. Once the sauce it cooked, make little holes with a spoon and break a whole egg in it. Then put the heat on low and cover and let cook for 10 minutes.

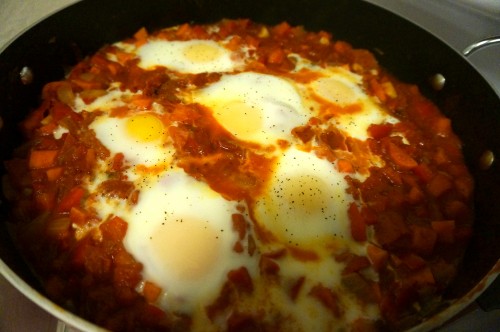
Shakshuka with the eggs cooking

Shakshuka with a tomato, red pepper, chile pepper, and carrot base and eggs simmering

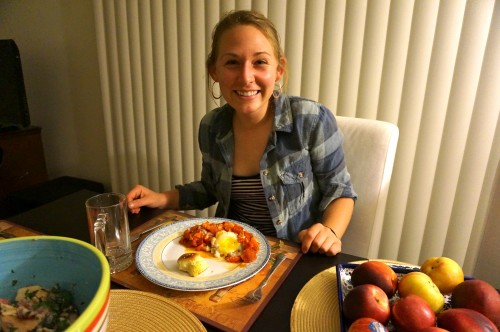
Shakshuka goes great with pita or challah and can also be accompanied by an Israeli cheese called labneh or plain Greek yogurt. It was spicy and savory and the eggs came out perfect. Claire, another one of my graduate student friends, who I went on this awesome trip to the redwoods with, came over to join us for our feast after spending hours washing redwood roots in the lab. The three of us were practically shrieking with delight while eating the fantastic fresh tasting fattoush and watermelon salads which went really well with the shakshuka. The challah that we had baked was delicious dipped into the shakshuka. All in all, it was a successful fun filled evening filled with delicious food and wonderful fungi loving ladies.

Claire looking super stoked to be eating the shakshuka

Claire looking super stoked to be eating the shakshuka

DSC02408

Fattoush, watermelon salad, and shakshuka Middle Eastern feast

Home made Challah and a dessert called malabi


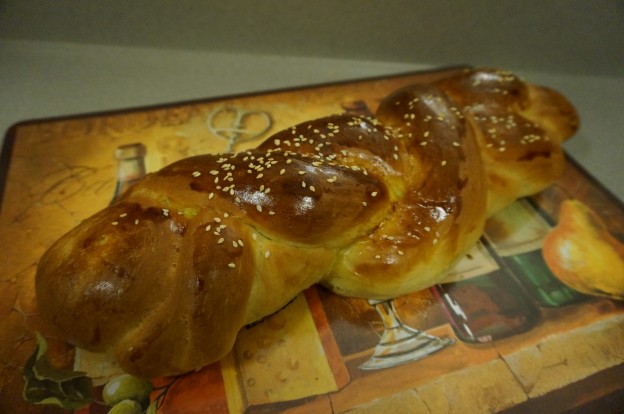
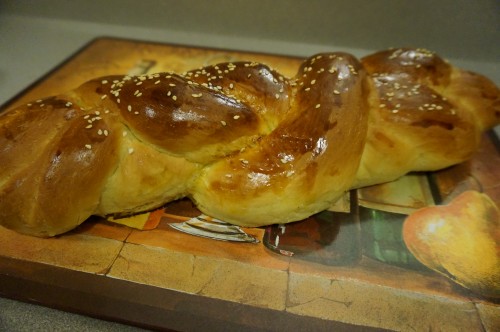
Challah

Challah

The Jewish mother inside me has been dying to get out and try baking a challah. I didn’t feel quite equipped to do this on my own, so I invited over Stav, the Israeli graduate student that I’ve been hosting in my lab all month, to come over and help me bake one. Stav had a recipe from her mother-in-law so we were locked and loaded and ready to go.

Neither of us really knew what we were doing, but I think the end product was pretty fantastic if I do say so myself :) Well Stav claims that she didn’t know what she was doing and she had never made a challah on her own before, but she did a great job pulling it together. I, on the other hand, had truly never made a challah from scratch and mostly I just ended up photo-documenting the experience :)
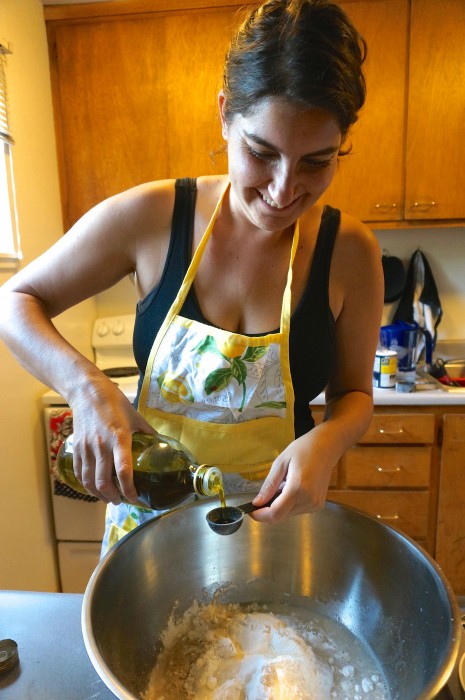
Measuring out ingredients for the challah - I love how happy Stav looks!

Measuring out ingredients for the challah – I love how happy Stav looks!

Challah is a delicious egg bread that involves a simple list of ingredients: flour, sugar, yeast, egg yolks, olive oil, sugar, and some sesame seeds. Mind you it does take a while to prep and bake to prepare for that. Luckily we had plenty of time to wait for the challah to rise since we decided to make a huge Middle Eastern feast consisting of fattoush, watermelon salad, and shakshuka while waiting for the bread to rise and bake, but you can get creative with your time.

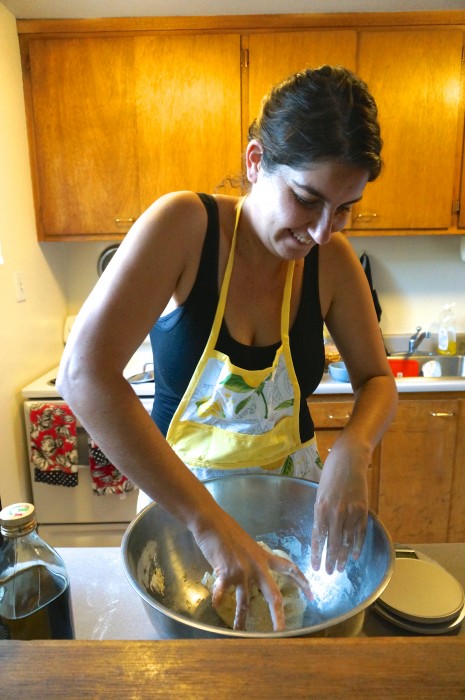
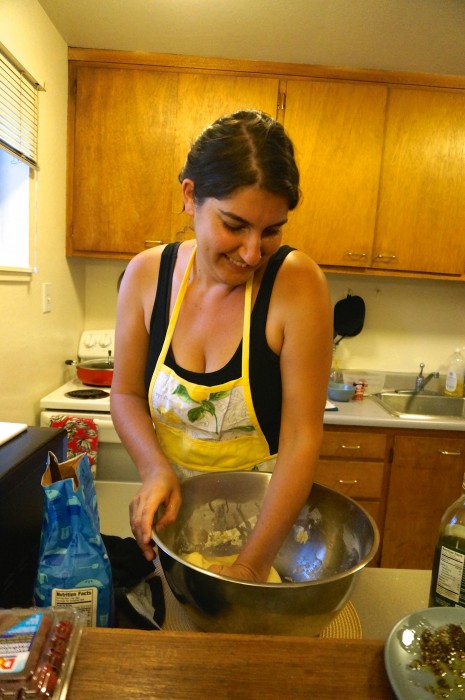
Kneading the dough

Kneading the dough. Side note – how cute does Stav look in my apron? I bought it in the Amalfi coast of Italy where everyone is obsessed in lemons.

To make the challah dough, first mix together 0.5 kg of flour, 1 tbsp dry yeast, 2 tbsp sugar and a little room temperature water and mix it with your hands in a bowl. This is a bit touch and go getting the right flour to water ratio, but mix it up until it is well mixed and not too sticky and then add 2 egg yolks and 3 tbsp olive oil. At this point knead the dough really well with your hands. At the very end add 1 tbsp salt. Don’t add the salt too soon otherwise it interferes with the yeast. Next cover it with a towel and let it sit and rise somewhere warm for 30 minutes to 1 hour depending on how hot it is outside or in your kitchen.

Kneading the dough for a second time. Really use some strength here!

Kneading the dough for a second time. Really use some strength here!

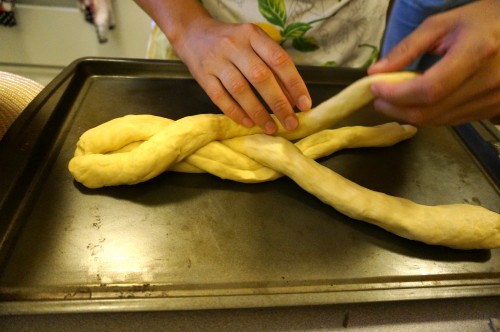
After it’s risen the first time, knead it really well for several minutes and punch out all the air. This is time to get our all of your aggression! Then make three strands and braid the challah straight onto the baking sheet. We sprayed the baking sheet with a bit of pam first so the bread wouldn’t stick and Stav braided two beautiful little challahs.

Braiding the challah

Braiding the challah

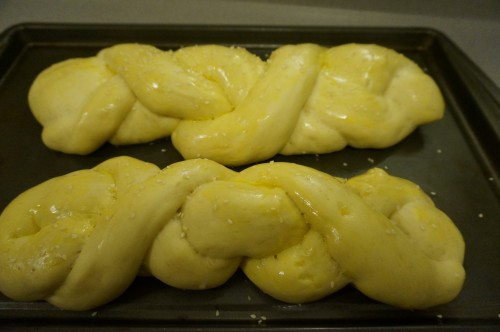
Brush the top with egg yolk and then sprinkled some sesame seeds on top. Let rise for another half an hour after this and preheat the oven to 375 F.

The challah fully risen before we put it in the oven

We had to wait a long time for the challah to rise before putting it in the oven

How long it takes to cook depends on your oven but for us it took less than 20 minutes for it to get golden brown and firm. It tasted so fresh and warm and chewy and was great dipped into the zhoug mixture, which is a spicy Middle Eastern mixture of some combination of coriander leaves, green chile, garlic and either caraway seed or cumin.  I bought both green and red zhoug spice mixes at the Arab shuk in Jerusalem when I was in Israel and hadn’t figured out an opportunity to use them yet. We mixed them with olive oil and dipped pita and challah into it which was great. My friend Claire also suggested mixing it in with Greek yogurt and olive oil which I will have to try next. We also ended up adding the red zhoug to the shakshuka so it is a great flavorful spicy spice mixture to have around. Let me know if you have anymore tips for how I can use it :)

Everybody holla for challah!

Everybody holla for challah!

In addition to baking the challah I had also been wanting to use the rose water which I also bought in Israel. Stav knew that I had been wanting to use the rose water so she suggested that we make a popular Israeli dessert that features rose water called malabi.

Ingredients for malabi: milk, cream, sugar, corn starch

Ingredients for malabi: milk, cream, sugar, corn starch

As you may recall from my previous posts about eating my way through Israel, we ate this delicious vegan pudding with coconut and rose water called sachleb at one of the restaurants we went to, which is very similar to malabi. Malabi is a creamy, milk based pudding that is super popular in Israel and most importantly utilizes rose water.  To make this dish for real it requires hours of chilling in the fridge, but we were make shift and put it in the freezer while we ate dinner so that it would set faster.

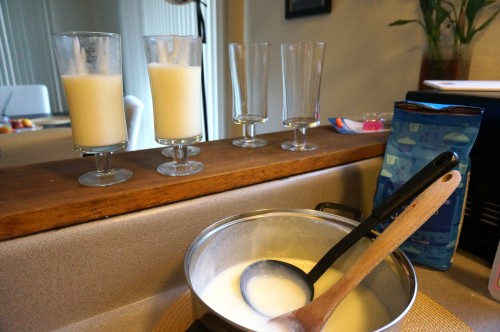
Ladling the malabi into glasses

Ladling the malabi into glasses

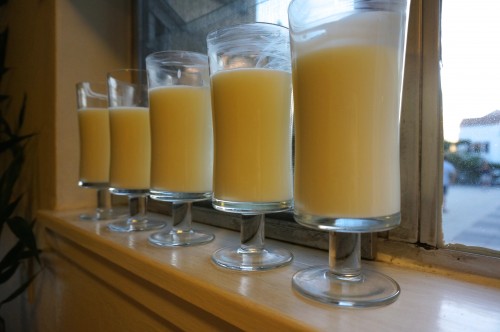
Malabi is pretty basic and involves only milk, cream, corn starch, sugar, and rose water for the pudding base. I’m going to be a bit make shift mixing European and American units because this recipe came from Stav, but hopefully you can catch the drift :) The first step is to mix together 8 tbsp of corn starch with 1 cup of milk and whisk it until it’s dissolved. It’s sticky and viscous but keep at it, and add a couple squeezes of rose water to this mixture. Meanwhile, measure out 1 liter of milk (minus the cup you mixed with the corn starch and rose water) and 250 mL cream and put it in a pot on the stove and start to boil. Right before it starts to boil, add the corn starch milk mixture, and also add 0.5 cup of sugar. Then bring it to boil again, and once it starts boiling take it off the heat and turn off the stove. Then find some pretty cups or small glasses to pour it in. I had some whiskey tumblers that a friend had given me so we used those. It was really hot so we set them to cool by my window while we cooked the dinner.

Malabi cooling on the window sill

Malabi cooling on the window sill

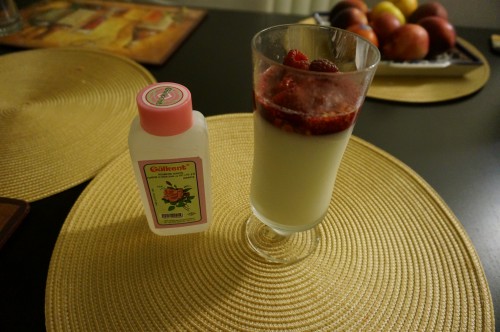
When ready to serve the malabi, mix together sugar and water to make a simple syrup in a pan. We got creative and added some crushed raspberries (they were on sale at Berkeley bowl!) and some more rose water. We poured the syrup on top of the pudding. Then we sprinkled on chopped up peanuts and shredded coconuts.

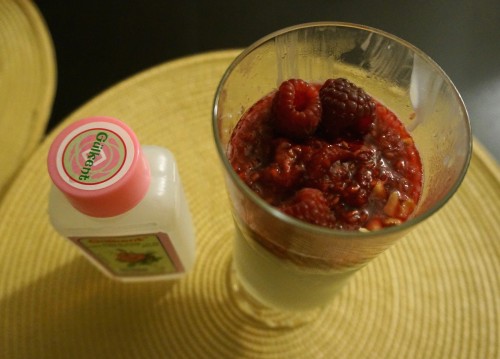
Malabi with rose water and crushed raspberries syrup

Malabi with rose water and crushed raspberries syrup

Stav said we could also try adding date syrup and pistachios, which I might have to try next time I make it since another ingredient that I happened to buy in Israel was date syrup :)  The malabi was fruity and floral and fresh tasting and a great end to a fantastic meal.

Malabi - Israel milk based pudding with rose water, raspberries, shredded coconut, and crushed peanuts

Malabi – Israel milk based pudding with rose water, raspberries, shredded coconut, and crushed peanuts

And here is my lab enjoying the challah on Friday:

Challah time in the Bruns lab!

Challah time in the Bruns lab!


Chard cakes with sorrel sauce

These chard cakes are the perfect vaguely healthy yet super decadent summer appetizer or side dish.  They are seriously so good is difficult to describe. It’s this odd sensation of something super healthy and good for you like chard, and then made a little bit sinful by deep frying it, but then it’s covered in this really fresh and light tasting sorrel sauce.  The recipe for the chard cakes is on p. 149 of Yotam Ottolenghi’s Plenty and is also featured online here.

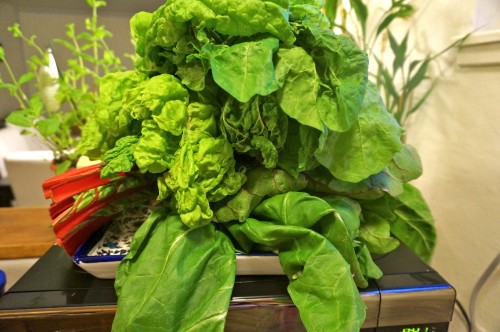
This is how much I love swiss chard

This is how much I love swiss chard

I don’t think I’d ever cooked with swiss chard before starting this blog, but now I’ve cooked at least 4 recipes featuring it. It is just so good the way that Yotam Ottolenghi suggests making it, and it is especially well complemented by Greek yogurt, which I think has been a key ingredient in every swiss chard recipe I’ve made so far (I especially really loved the swiss chard with tahini, yogurt, and buttered pine nuts, featured here).

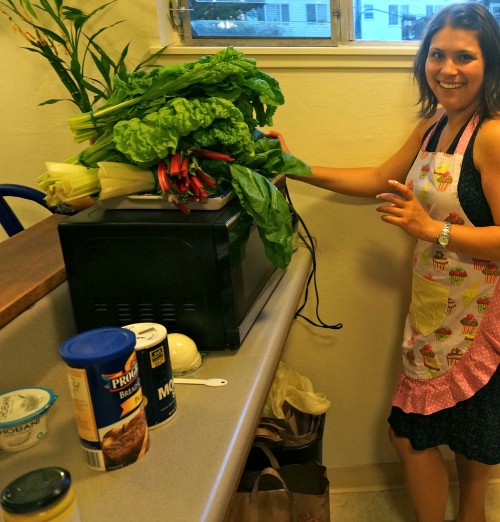
Here I am contending with my mountain of swiss chard

Here I am contending with my mountain of swiss chard

Unfortunately it’s summer and dry as a bone, so I don’t have any mushrooms or a mushroom lesson for you today, but I made this recipe for the first time with my friend Rachel, who is a fellow microbial ecologist and has started a blog herself teaching people about microbes – so check it out if you want to learn some microbial ecology :)

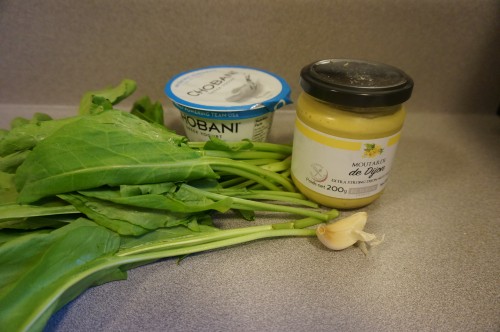
Ingredients for the sorrel sauce - Sorrel, garlic, greek yogurt, dijon mustard

Ingredients for the sorrel sauce – sorrel, garlic, Greek yogurt, dijon mustard

As for the chard cakes, the first step is to make the sorrel sauce, which requires either a food processor or a blender. I used a food blender while making it at Rachel’s house and I used an immersion blender when I made it again at home. Personally I think the immersion blender was a bit easier but either works. Make sure to start boiling the water for blanching the Swiss chard while making the sauce because the sauce doesn’t take that long to make and you might get hungry while waiting for the water to boil!

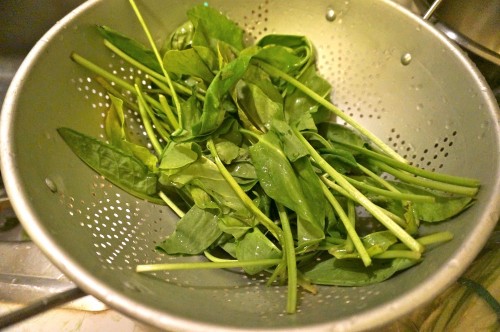
Sorrel leaves

Sorrel leaves

I don’t think I’ve ever cooked with sorrel in my life before! It grows wild all over California and my other friend Rachael, who I took mushroom hunting with me in Point Reyes, was pointing out and collecting the wild sorrel growing along the trails. Next time I will have to collect it myself in the woods, but this time I bought it from the Berkeley bowl.  Blend the sorrel leaves, Greek yogurt, garlic clove, olive oil, and Dijon mustard until smooth.

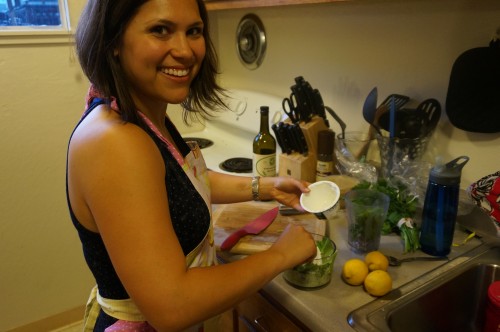
Mixing together ingredients for the sorrel sauce

Mixing together ingredients for the sorrel sauce

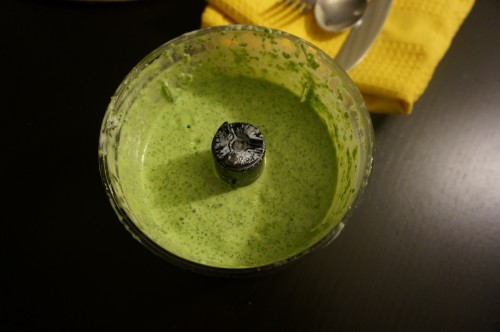
It makes a beautiful bright green sauce that I will have to find other uses for this week since we had a lot of extra! I think it would be good on cous cous or steak and would probably go well with grilled porcinis :)

Sorrel sauce in the immersion blender

Sorrel sauce in the immersion blender

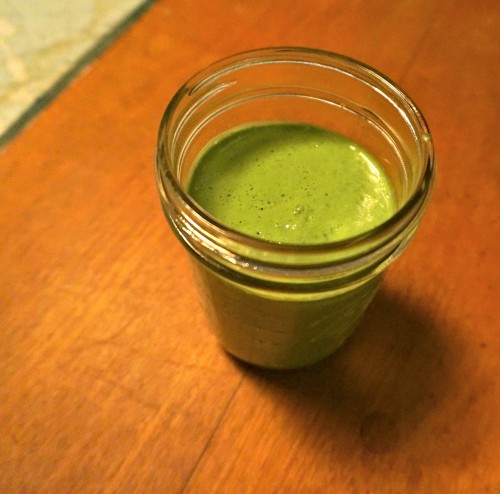
I felt like I would totally fit in with all of the Berkeley and Oakland hipsters when Rachel gave me a mason jar to store the sorrel sauce in:

sorrelsauceinmasonjar

Sorrel sauce

Isn’t it beautifully bright green?

Sorrel sauce in mason jar

Sorrel sauce in mason jar

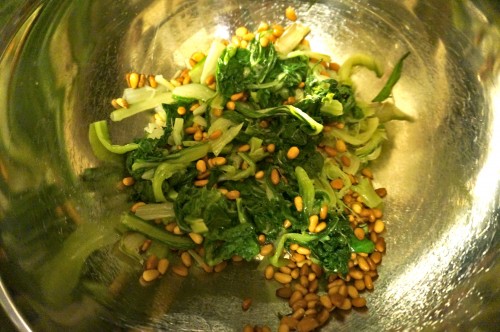
After the sauce is made the next step is to blanch the swiss chard. While the swiss chard is blanching, sautee pine nuts in oil. This is another repetitive theme in the Ottolenghi books and it is delicious! Pine nuts add such a nice decadent crunch to all of these dishes and they are so good toasted!

Blanched swiss chard with toasted pine nuts

Blanched swiss chard with toasted pine nuts

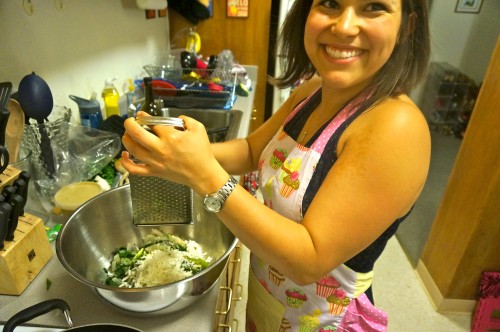
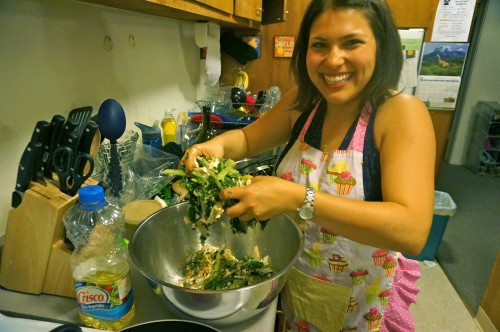
Next add the egg, bread crumbs, salt, pepper, and cheese. I had no idea where to find kashkaval cheese but a quick google for substitutions on my iphone while at the grocery store found me mozzarella. Rachel, who has made the recipe before and said she went out of her way to find kashkaval cheese at a specialty cheese shop, said it tasted way better with mozzarella. The mozzarella was creamy and stringy which held together the cakes very well. Then came the fun part – mixing everything together and molding the cakes with my hands! While mixing the cakes we started heating up canola oil in a pan.

Adding the mozzarella cheese

Adding the mozzarella cheese

Mixing up the chard cakes

Mixing up the chard cakes

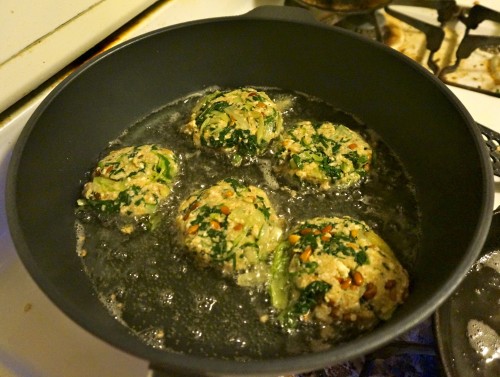
Once the oil was hot we fried the cakes in the oil for 2-3 minutes on each side. This was pretty much my first time frying anything!

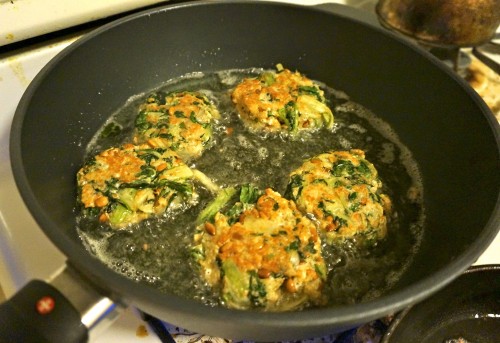
swiss chard cakes frying in oil

swiss chard cakes frying in oil

Don’t they look pretty when they start to brown?

Swiss chard cakes browning

Swiss chard cakes browning

Rachel didn’t have any paper towels but she did have leftover napkins from Halloween which we put to good use!

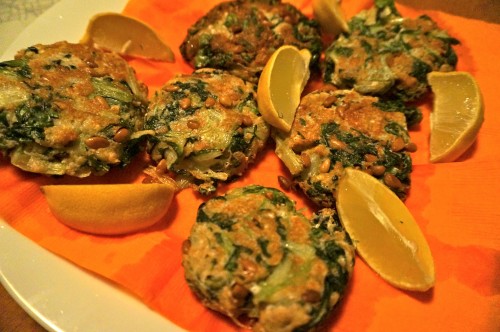
Chard cakes with lemon wedges and halloween napkins

Chard cakes with lemon wedges and halloween napkins

These cakes tasted super decadent and delicious. They were satisfying and surprisingly not that unhealthy tasting given they were fried in oil.

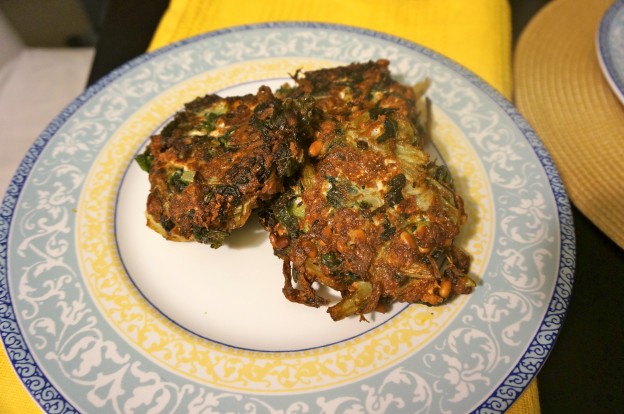
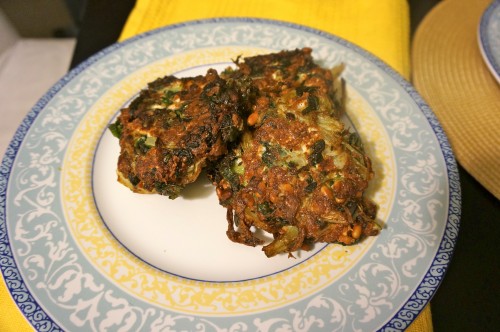
Chard cakes fried to perfection

Chard cakes fried to perfection

You have to make them yourself. Seriously, just go do it. You won’t regret it! Here is the ingredient list to help you out :)

Sorrel sauce:

  • 3 cups sorrel leaves, washed
  • 1/2 cup Greek yogurt
  • 1 garlic clove, crushed
  • 2 tbsp olive oil
  • 1/2 tsp Dijon mustard
  • salt

Cakes:

  • 1.25 lbs Swiss chard
  • 1/3 cup pine nuts
  • 1 tbsp olive oil
  • 4 oz kashkaval cheese, coarsely grated (I used mozzarella)
  • 1 egg
  • 6 tbsp dried white breadcrumbs
  • 1/4 tsp salt
  • black pepper
  • vegetable oil for frying

Brunch time! Green pancakes with lime butter

Yesterday I decided to make brunch for my friend Valerie.  Valerie and I met at sleep away camp when we were 10 and have been friends ever since!  One of the first recipes that caught my eye when I bought Plenty, by my main man Yotam Ottolenghi, was the green pancakes with lime butter from page 150.  I am SO glad that I finally made them because they are DELICIOUS. The pancakes are savory and taste like a Chinese egg roll – pancake fusion, or perhaps similar to Jeon, if you are familiar with Korean food.

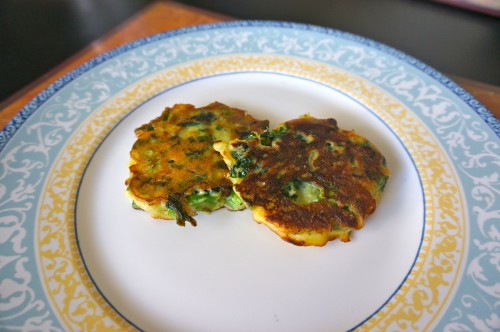
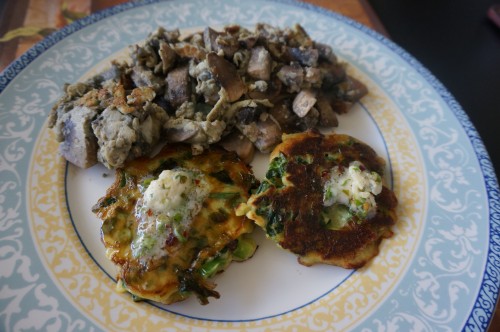
Green pancakes

Green pancakes in all their savory delicious glory

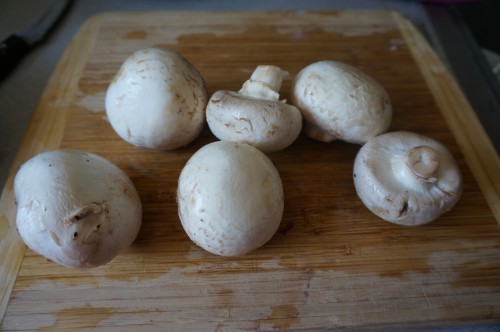
I decided to accompany the pancakes with scrambled eggs with you guessed it, yes MUSHROOMS. My blog has been sadly bereft of mushrooms as of late, so I decided to add them in to my scrambled eggs. Even though they were just regular button mushrooms from the Berkeley bowl, any mushroom is better than no mushroom in my opinion, and I’ve always thought the button mushrooms get a bad rap. Did you know that Agaricus bisporus, the common grocery store button mushroom, is actually the same species as cremini and portabella? Yes, you thought you were being fancy buying portabella mushrooms, but in fact it’s just a button mushroom grown larger. I’m not saying they aren’t still good though..look how pretty these babies are:

mushrooms!

mushrooms!

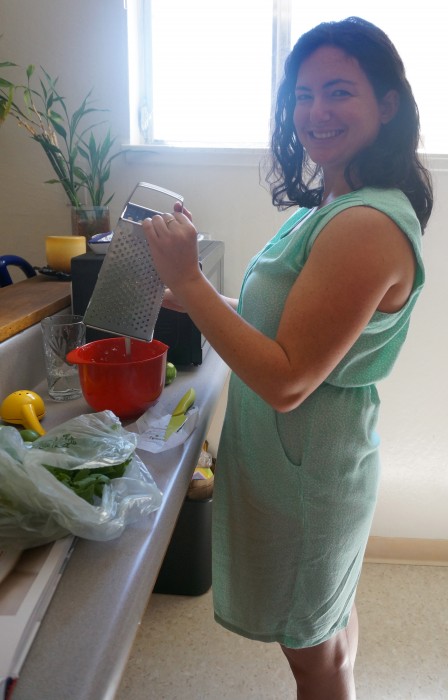
I sauteed some mushrooms with half a red onion for the eggs while Valerie got started on the lime butter, which is a magic combination of butter, lime juice, lime zest, salt, pepper, cilantro, garlic, and chile flakes. Here is Valerie making the lime butter:

Valerie making the lime butter with lime zest, lime juice, salt, pepper, cilantro, garlic, and chile flakes

Valerie making the lime butter with lime zest, lime juice, salt, pepper, cilantro, garlic, and chile flakes

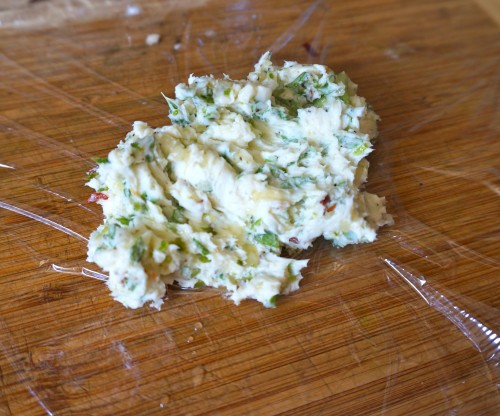
Here is the completed lime butter before we rolled it up in saran wrap and stuck it in the fridge to chill:

lime butter with lime juice, lime zest, salt, pepper, cilantro, garlic, chile flakes about to be chilled

lime butter with lime juice, lime zest, salt, pepper, cilantro, garlic, chile flakes about to be chilled

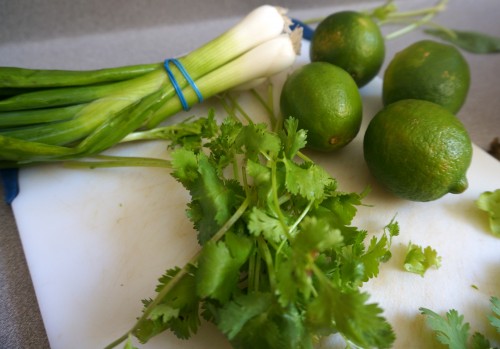
How beautiful are all of these green ingredients for the green pancakes?

Green onions, cilantro, and limes for the green pancakes with lime butter

Green onions, cilantro, and limes for the green pancakes with lime butter

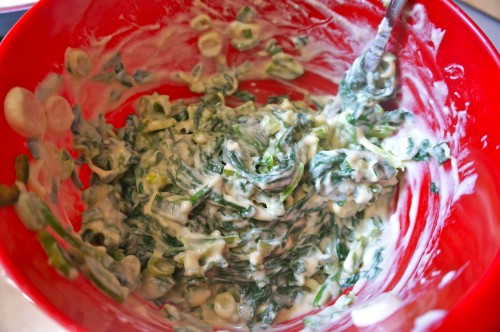
The next thing to do is to wash and wilt 0.5 lb of spinach in a pan, drain it, let it cool, squeeze out the moisture, roughly chop it, then set it aside. For the pancakes, Ottolenghi calls for self-rising flour, which you make by adding 1.25 tsp baking powder and a pinch of salt to 1 cup of regular all-purpose flour.  Melt 4 tbsp of butter in a pan and then add it to 3/4 cup self rising flour, 1 tbsp baking powder, 1 egg, 0.5 tsp salt, 1 tsp cumin, and 2/3 cup milk in a large mixing bowl and whisk until smooth.  Finely slice the green onions, then add them and the wilted spinach to the pancake mixture along with a green chile. Ottolenghi called for 2 fresh green chiles but he did not specify which kind and since I’m not huge on spicy I used one large jalapeno pepper. I removed the seeds from the jalapeno pepper before adding it to the pancakes but if you are a big fan of spicy, by all means go ahead and add more! Here is what the pancake mixture looks like:

Pancake mixture with flour, baking powder, egg, butter, salt, cumin, milk, green onions, spinach, and green chile

Pancake mixture with flour, baking powder, egg, butter, salt, cumin, milk, green onions, spinach, and green chile

The next step is a bit complicated – you are supposed to whisk an egg white to soft peaks and gently fold it into the batter. What exactly is a soft peak?? I had no idea about this but luckily Valerie seemed to know, but unfortunately she said my whisk stinks and she could not whisk to soft peaks with it.  Luckily the pancakes still turned out gorgeous even with the poorly whisked egg whites:

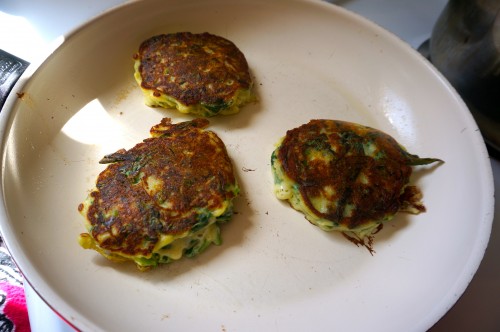
Green pancakes browning in the pan

Green pancakes browning in the pan

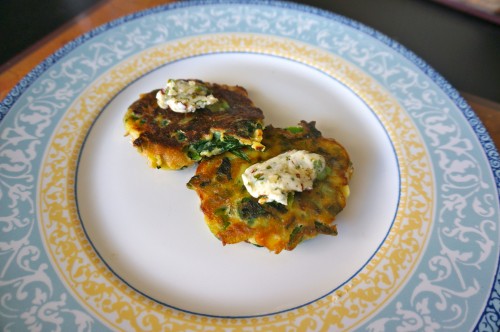
Heat a pan to medium high heat, add olive oil, and add 2 tbsp of pancake batter for each pancake and cook them for 2 minutes on each side. Here are the pancakes with lime butter:

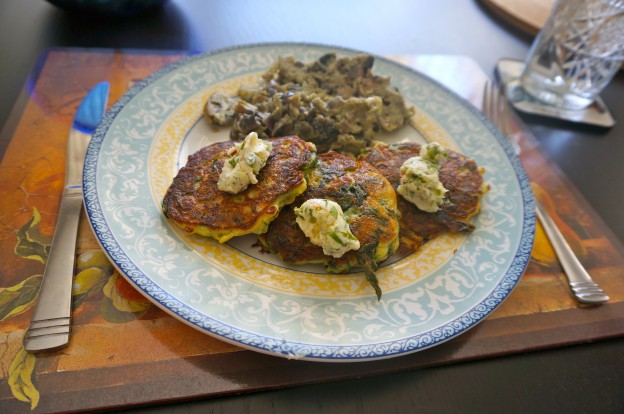
Green pancakes with lime butter

Green pancakes with lime butter

For the scrambled eggs, I cracked and whisked up 5 eggs, added salt, pepper, and basil flakes, and added them to the sauteed mushrooms and onion:

Green pancakes with lime butter with scrambled eggs with mushrooms and onions

Green pancakes with lime butter with scrambled eggs with mushrooms and onions

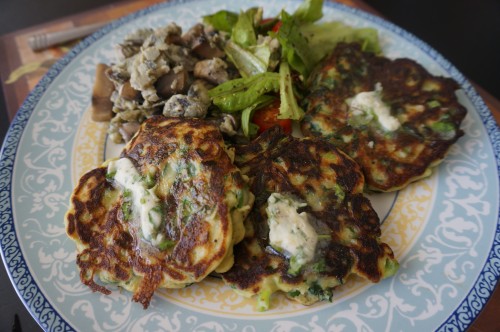
Valerie brought over some fresh lettuce from her mother’s garden and we made a simple lettuce and tomato salad to accompany the pancakes and scrambled eggs. Here is the completed meal:

DSC02021

Green pancakes with lime butter, scrambled eggs with mushrooms and onions, and lettuce and tomato salad

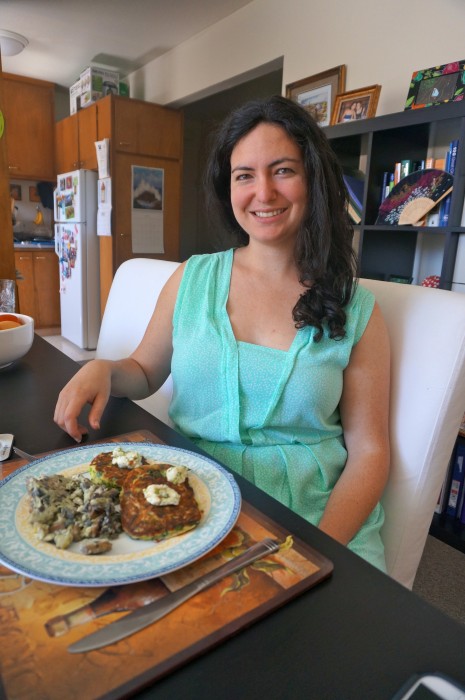
Here is Valerie enjoying the lovely meal:

Valerie and her delicious brunch of green pancakes with lime butter and scrambled eggs with mushrooms

Valerie and her delicious brunch of green pancakes with lime butter and scrambled eggs with mushrooms

Next time you are thinking of going out to one of those trendy brunch spots and waiting over an hour in line to be at the hippest spot in town, think about making this brunch at home instead. Delicious high quality and way cheaper brunch fair all from the comfort of your own home – plus you get to keep the leftovers. I highly recommend it :)


Ingredients:

Lime butter
8 tbsp (1 stick) unsalted butter, at room temperature
Grated zest of 1 lime
1 1/2 tbsp lime juice
1/4 tsp salt
1/2 tsp white pepper
1 tbsp chopped cilantro
1/2 garlic clove, finely chopped
1/4 tsp chile flakes

1/2 lb (about 8 cups) spinach, washed
3/4 cup self-rising flour
1 tbsp baking powder
1 egg
4 tbsp unsalted butter, melted
1/2 tsp salt
1 tsp ground cumin
2/3 cup milk
6 medium green onions, finely sliced
2 fresh green chiles, thinly sliced
1 egg white
Olive oil for frying

Eating my weight in gelato in Italy

As you know from my previous post, I got a free trip to Zurich for work to give a talk at the Mycorrhizal Symbiosis Symposium.  The talk went well and I had fun at the conference, which was awesome scientifically and intellectually, but I found the food in Zurich lacking.  I am just not a heavy Germanic food kind of girl. Happily for me, my cousin Aaron and his wife Kate live in Naples, so after the conference I flew to Italy to visit. As you can imagine, I took my eating very seriously on this trip, especially when it came to gelato!  I knew you all would be interested in the gelato I ate in Italy so I kept a list of flavors I tried. So here it is!!  Another day another gelato..

gelato #1:  nocciolata and stracciatella – chocolate hazelnut goodness and creamy milk based gelato with chocolate strands thrown in – analogous to chocolate chip ice cream but so much better because the chocolate is melded throughout rather in discrete chips. Here I am enjoying a gelato in a gelateria in my cousin’s building before I even go upstairs to put down my luggage:

Enjoying Nocciolata and Stracciatella gelato before I even put down my luggage

Enjoying Nocciolata and Stracciatella gelato before I even put down my luggage

gelato #2: pan di stelle – After a disappointing Nutella festival with no nutella (What!?!?) and then walking a mile to the world famous pizzeria da michele, where allegedly pizza was born, only to find it closed, I definitely needed gelato!  I tried a mysterious flavor called pan di stelle, which I believe is an Italian chocolately star cookie. It was ok but not my favorite.

gelato #3: pistachio, baccio, straciatella – After a day of trekking around Herculaneum in the rain, which was a wonderful rainy day activity in fact and I highly recommend a visit, I decided I needed to go for a three-fer gelato this time. I tried pistachio, baccio, and returned to the delicious straciatella to make sure I had at least one familiar favorite.  Baccio is chocolate hazelnut, and is delicious, although I recommend nocciolata over baccio for you nutella lovers. 

gelato #4: ambroggio e fragola – Kate and I took a lovely day trip to Capri, which is a gorgeous resort island an hour ferry ride from Napoli. It is soo soo pretty and luxurious, but be prepared to watch the dollars drain out of your pockets. We spent nearly 40 euros to get 5 minutes in a cave called the Blue Grotto, which admittedly, was pretty cool:

Blue grotto cave in Capri

Blue grotto cave in Capri

But the real highlight of Capri as far as I’m concerned was the galeto. Hands down some of the best gelato I’ve ever tried..ever! It was sooo good!!! I tried a flavor called ambroggio, which as far as I can tell was ferrero rocher flavored gelato, and was to-die-for. I paired it with fragola, which is strawberry. Here I am living the life of luxury and enjoying gelati in Capri:

IMG_7296

Ecstatic after discovering the most amazing gelato flavor ambroggio in Capri

Kate also got the delightful ambroggio, but she paired it with after eight (mint chocolate candy for those of you who don’t know what this epic candy is):

IMG_7297

Kate enjoying gelato in Capri

gelato #5: torta caprese e melone- Kate and I decided that the gelato in Capri was so good, that after taking this seriously scary chairlift ride to the top of a mountain, we deserved to treat ourselves to gelato again. While scary (Aaron thought I was totally lame for thinking this was scary, but I’m afraid of heights, so it was scary for me!), the view was pretty epic:

Chairlift ride up the mountain in Capri

Chairlift ride up the mountain in Capri

The view from the top was just incredible:

View from top of mountain in Capri

View from top of mountain in Capri

While the view was gorgeous, I was still a little rattled from the chairlift ride up and was seriously dreading the ride down, which looked scarier. I decided I needed a little prosecco to calm my nerves before taking the scary ride back down the mountain:

Enjoying la dolce vita in Capri

Enjoying la dolce vita in Capri

And finally, back to the gelato! After surviving the ride back down the mountain, Kate and I enjoyed another gelato. I tried something called torta caprese, which really I’m not sure what it is, but it was the best gelato OF MY LIFE. Seriously, it was so good. If you go to Italy, go to Capri just for the torta caprese and ambroggio gelato. DO IT.

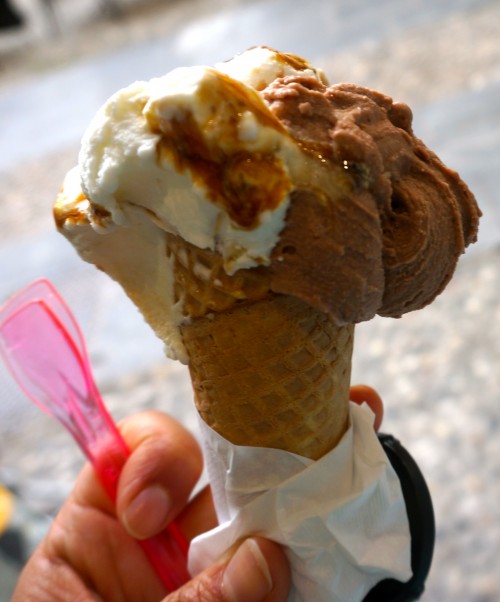
gelato #6: nocciolata e mandarlo- After several days of hanging out in Naples and enjoying day trips to Positano and Sorrento in the amalfi coast, Herculaneum, and Capri, Aaron, Kate, and I took a road trip up north to experience the Cinque terre. Cinque terre is five towns located about a 6 hour drive north of Naples on the coast. They are gorgeous picturesque villages with cute painted houses etched into the rocky coast.  We stayed in the largest and northern most village, Monterosso. Our first full day in Cinque terre we took the train to the southern most village, Riomaggiare, and enjoyed a gelato. I returned to an old fave, nocciolata, and paired it with a new flavor for me, mandarlo, which is almond. Mandarlo was delicious! Another flavor that I highly recommend! Here I am enjoying nocciolata and mandarlo in Riomaggiare:

IMG_7319

Nocciolata and mandarlo gelato in Riomaggiare

Here are Kate and Aaron enjoying their gelati:

IMG_7323

Kate and Aaron enjoying gelato in Riomaggiare

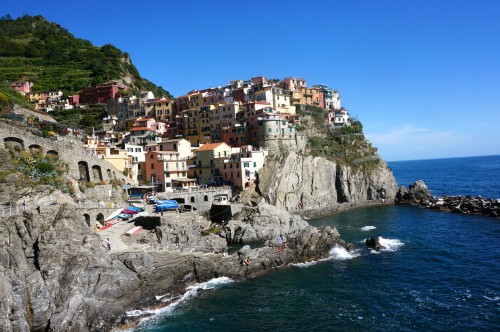
gelato #7:  stracciatella e cioccolotto – After relaxing in Riomaggiare, we took the train to Manarola and enjoyed an epic swimming hole.  Manarola was totally one of my favorite towns. Check out how cute it is:

The town of Manarola in Cinque terre

The town of Manarola in Cinque terre

After the relaxing day we were ready to check out the nightlife in Monterosso, which Rick Steves claims is the nightlife hub of the Cinque terre. Let me tell you, it was dead! We were walking around at midnight on a Friday night, and everything was closed! A middle aged couple saw us walking around and asked us where the nightlife was, and we had to let them down that we couldn’t find any. Luckily, one gelateria was still open and we got the last gelato of the day before they closed their doors. Since I wasn’t super inspired by the late night flavor options, I returned to my old fave stracciatella and paired it with cioccolotto, or milk chocolate.

gelato #8: mandarino e tiramisu – For our second day in Cinque terre, we decided to hike from Monterosso to Vernazza, the next town over. The hike took nearly 2 hours and was pretty hilly, but it provided us with gorgeous views of the Cinque terre:

View on the hike from Monterosso to Vernazza in Cinque terre

View on the hike from Monterosso to Vernazza in Cinque terre

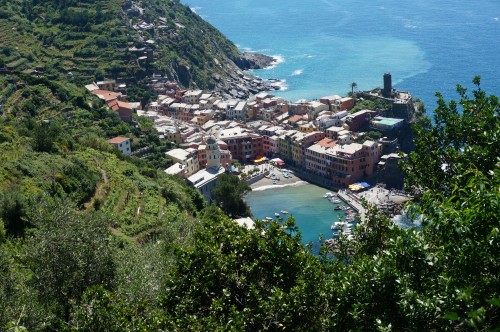
View of Vernazza from the trail

View of Vernazza from the trail

After enjoying Vernazza, which was another fabulous town, we decided to take the train to Corniglia. We should have read Rick Steves’ account of Corniglia being for the “hermits, anarchists, and mountain goats” more carefully before we attempted to visit. You have to walk up a stair case of 365 stairs before even being able to enter the village! It was torture! Needless to say, Corniglia was NOT our favorite town. We were there for barely 45 minutes total but we did manage to squeeze in a gelato before we left. At least the gelato was delicious. I tried mandarino and tiramisu, which was delightful:

IMG_7336

Tiramisu and mandarino gelato in Corniglia

IMG_7341

Kate enjoying dark chocolate and coconut gelato in Corniglia

IMG_7338

gelato – the only part of Corniglia we enjoyed!

gelato #9: Fichi e caramelli e ciocco crok – After a heavenly 2 days in Cinque terre, we took a four hour road trip to Lake Como. What can I say about Lake Como other than I desperately want to go back? We were only there for half a day but I could easily imagine spending several days there. It was BEAUTIFUL. Warm weather, alpine lakes, and the Alps in the background. It was gorgeous:

Lake Como

Lake Como

While we were only there for half a day, we did manage to squeeze in a gelato. I had “Ciocco crok” which was chocolate with hazelnuts and almonds mixed in, and fichi e caramelli, or caramelized figs, gelato. Fichi e caramelli was really realy good!

Fichi e caramelli e ciocco crok gelato in Lake Como

Fichi e caramelli e ciocco crok gelato in Lake Como

gelato #10: Swiss chocolate and passionfruit mango – Kate was disappointed that I did not make it to number 10 while in Italy, but luckily for me, Switzerland also has good gelato :) I took the train from Milan to Zurich across the alps, and when I landed in Zurich I was ready to search for gelato number 10. Unfortunately, Zurich is a zillion times more expensive than Italy, and I had to shell out 7.90 francs for gelato in Zurich compared to 2 euros for gelato in Italy. Of course, francs and euros are both worth more than US dollars, so it was a freaking expensive gelato! Luckily I didn’t know the price before I already had the gelato in hand, because I might have backed out if I had known in advance it was nearly $9 for a cone. Then I would not have gotten to experience the joy of swiss chocolate gelato! You pay dearly for it, but man is it delicious. I paired it with passionfruit mango, which my sister Leslie claims is a weird combination, but I thought was great:

IMG_7438

Swiss chocolate and passionfruit mango gelato in Zurich that I paid nearly $9 for!

So there you go, gelato eating endeavor. Over the course of 1.5 weeks in Italy I ate gelato 9 times, with my 10th in Zurich, and then an 11th on the plane because Swiss Air served swiss chocolate gelato on the plane. So what do you think, did I get my gelato’s worth out of Italy? Could you have eaten more?

Chicken With Cardamom Rice

Drum roll please…my first ever meat meal that I’ve cooked from Yotam Ottolenghi’s cookbook Jerusalem!! And I made it in Italia!! Why am I in Italy you ask? Well, being a PhD student does have some perks. I traveled to Zurich for a scientific conference on Mycorrhizal Symbiosis, yes it was the most esoteric conference ever, and yes, that’s what I study :) For those of you who don’t already know, mycorrhizal symbiosis is the symbiosis between a fungus and plant root, and ~80% of plants have them.  They are responsible for delicious mushrooms such as porcinis and chanterelles :) While the conference was super interesting and my talk went well, the food in Zurich was not super exciting.  After a few days of eating heavy Germanic potato, bread, and cream based foods, I was ready to head to Italia to visit my cousin Aaron and his wife Kate, who live in Napoli AKA Naples.  Aaron is a lawyer for the Navy, and is stationed in Naples for 2 years.  After several days of eating my heart out of pizza and gelato (don’t worry I took pictures of all the food I ate in southern Italy and will be blogging about it shortly) I was ready to eat some home cooked food again.  I bought Jerusalem for Aaron and Kate and luckily it arrived yesterday right in time for me to get to cook for them before we leave for Cinque terre tomorrow.  I made the chicken with cardamom rice from Jerusalem, which I had been eyeing for a while.  You can find the recipe online here. My cousin Aaron and his wife Kate loved it – this was indeed a delicious one pot wonder:

DSC01635

Chicken with cardamom rice garnished with cilantro, parsley, and dill.

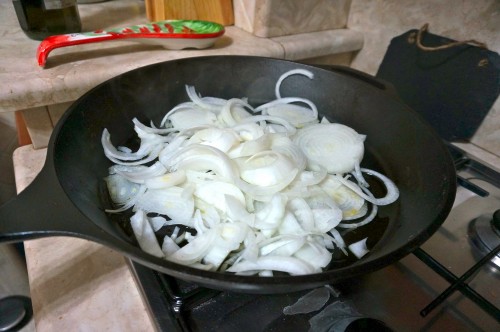
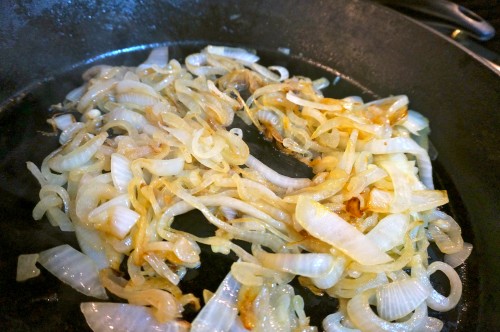
The first step is to caramelize the onions. Slice them up thinly then saute them in olive oil for a while. The recipe calls for 10-15 minutes but I left them in there for at least 25. It took a while for them to get properly browned, but luckily they don’t require much attention so you can do other things while the onions are browning.

DSC01620

Slices onions about to be caramelized

While they are browning prepare the barberries or equivalent. I could not find either barberries or currants, which Ottolenghi suggests as an alternative, so I used dried cherries. I soaked them in fresh squeezed lemon juice while the onions were caramelizing. I’m not quite sure what a currant or barberry tastes like, but the dried cherry was really tasty in the dish!

DSC01623

Caramelized onions

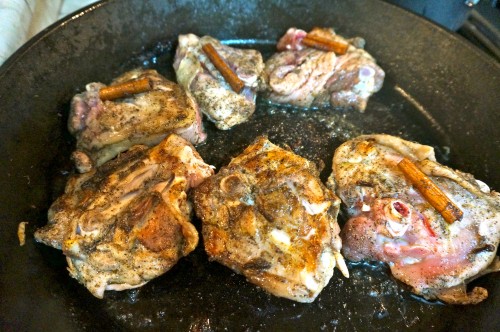
While the onions were caramelizing I rubbed down the chicken thighs with cardamom, cinnamon, cloves, salt, and pepper. I could not find whole clove pods but I found online that 1.5 tsp of ground cardamon can be substituted for 10 pods and it tasted really great so I recommend going with that since the dried spice is so much easier to find. Once the onions are caramelized remove them from the pan and replace them with the chicken.  Sear the chicken thighs on each side for 5 minutes. You really want to make sure you get the bone in skin on thighs for this. The thighs came out super juicy and also even if you don’t end up eating the skin (we didn’t because I couldn’t get it to properly crisp) I think cooking the meat with the skin on adds a lot of flavor and helps keep the meat super juicy.

DSC01626

Chicken smothered in salt, pepper, cardamom, cinnamon, and cloves searing in the cast iron skillet

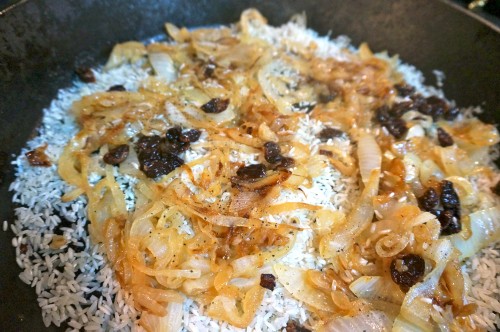
Remove the chicken thigh for a minute, then add the rice and caramelized onions back in the pan with salt and pepper and the dried cherries. Kate and I could not find basmati rice at the Navy commissary so we used long grain white rice instead.

DSC01628

Basmatic rice with caramelized onions, dried cherries rehydrated in lemon juice, salt and pepper

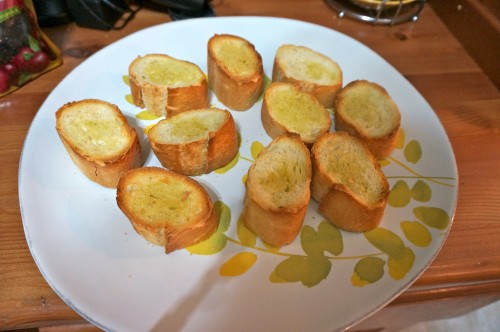
Getting into the navy commissary was a bit of a trick. The sales clerk at the front needed to look at my passport and was not happy with it and almost did not let me in since I’m not a part of the Navy, but Kate assured him that she was the one shopping and I was just accompanying.  He didn’t seem quite convinced but he begrudgingly eventually let us enter! Once the rice, caramelized onions, dried cherries/currants/barberries are in the pan, nestle the chicken back in and cover the pan and cook for 30 minutes. Since we had some free time we opened up a bottle of wine to drink while waiting for the meat to cook and I made some antipasti. Here is a fresh baguette we found at the grocery store and toasted with some olive oil in the oven:

DSC01629

Baguette toasted in the oven

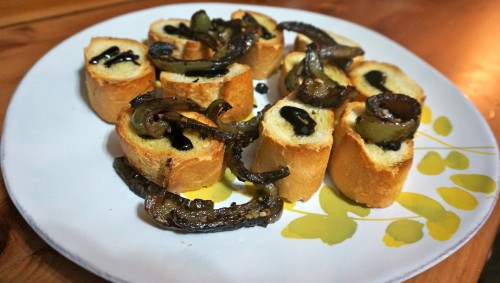
Then I sauteed some green peppers with garlic and Aaron added a balsamic vinegar paste thing on top of the bread that was really tasty.

DSC01633

Antipasti of toasted baguette with olive oil and balsamic vinegar paste, sauteed green peppers, and garlic

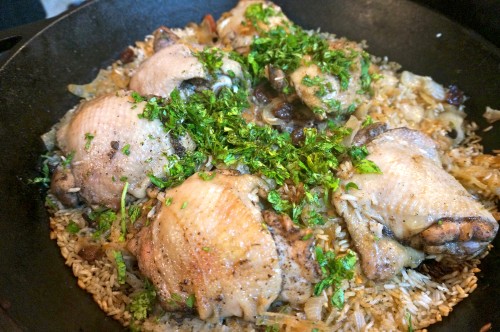
The chicken ended up taking quite a bit longer than 30 minutes to cook. We had a really large cast iron pan and the flame was not that large, so I guess you just have to check and make sure the chicken is properly cooked.  Unfortunately the skin never quite got crispy but after about 50 minutes the chicken was cooked properly and tasted really delicious and juicy.  I chopped up fresh cilantro and parsley but since I could not find fresh dill just added some dried dill for the garnish. Here is the final dish with the cilantro and parsley and dill garnish:

DSC01635

Chicken with cardamom rice, caramelized onions, cherries, and cilantro, parsley, and dish garnish

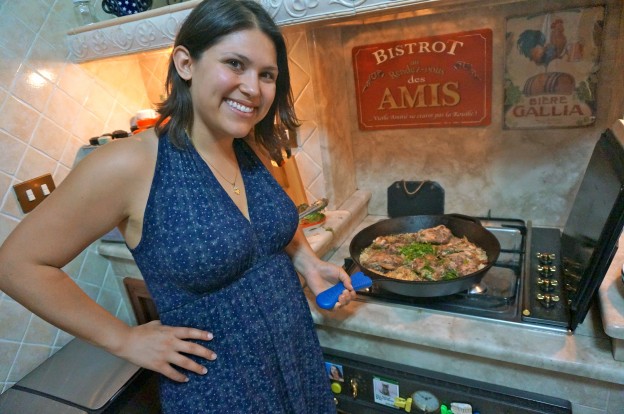
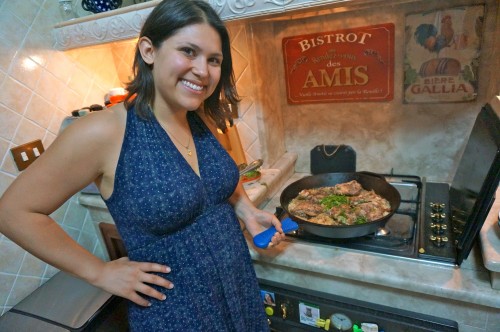
Here I am in Kate and Aaron’s super cute Italian kitchen:

DSC01639

Me cooking in Aaron and Kate’s cute Napoli kitchen

It’s way cuter than mine, I know. I’m also super jealous of their giant cast iron skillet. Did I mention that they also have an awesome view of the Mediterranean right outside their window?

IMG_7279

View of the Mediterranean from Aaron and Kate’s living room window

IMG_7280

View of via Napoli from Aaron and Kate’s apartment

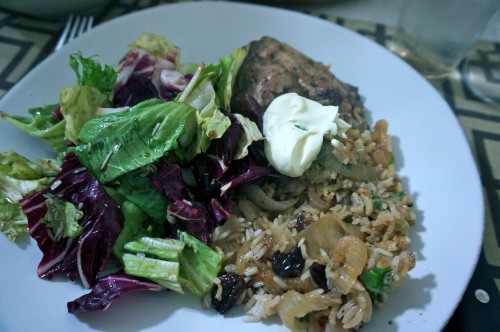
Yeah, I think I might have to move to Italy. Damn it is beautiful here. Kate made a light salad to accompany the chicken and cardamom rice. Ottolenghi suggests adding some olive oil to Greek yogurt and mixing it up and using it as a garnish. I highly recommend it – the yogurt really sets off the dish! It is so creamy and yummy mixed in with the flavorful cardamom rice with caramelized onions. Here is the final meal:

DSC01645

Chicken with cardamom rice accompanied by salad and Greek yogurt

The meal was a big hit! Kate and Aaron loved it and I have to say it was quite tasty. My first meat meal cooked from Jerusalem went off without much of a hitch even though I had to make a few substitutions to make it work in Italia. It’s also a pretty low key dish since it’s just one pot and you get to do other stuff while the onions are caramelizing and while the chicken is cooking, so it’s not that high maintenance. I’m having such a fun time visiting Italy perhaps I should move in with my cousin and his wife and Aaron suggested that I could earn my keep by cooking for them as their personal chef – seems like they liked my cooking :)

Barbecued maitake and mee goreng

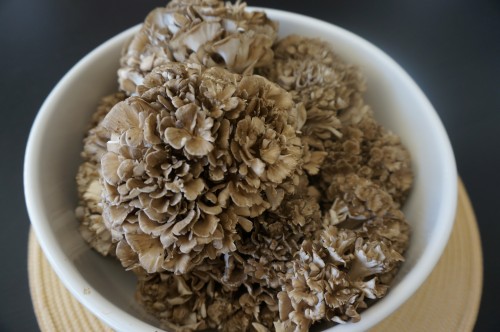
Maitake frondosa, known to some as ‘hen of the woods’ is a saprotropic fungus that makes a living by eating decaying wood.   While that may not sound incredibly appetizing, this ecology makes them fairly easy to cultivate and to produce reliably for consumption. This is lucky for me since they are not native to California and I can’t easily forage for them!  Since they are not native California mushrooms, I had never cooked these beautiful and intriguing mushrooms before, and I did not quite know what to do with them. Luckily, Justin Reyes from Gourmet Mushrooms, Inc suggested a delicious marinade inspired by this youtube video from chef Louisa Safia of LucidFood, which turned out to be quite the crowd pleaser. It was so popular in fact, that my friends Meera and Judy asked me for the recipe immediately after the dinner, and Meera went home and tried it out the next day!

Maitake Frondosa

Maitake Frondosa or ‘hen of the woods’

The first step is to make the marinade the night before you want to cook the mushrooms and let them soak it up overnight in the fridge.  Unfortunately, I only realized this last minute and found myself mixing up the marinade at midnight the evening before I cooked these mushrooms, but hopefully you can be smarter and plan ahead – trust me, this marinade is worth it!

Marinated maitake

Marinated maitake

Here are the ingredients for the marinade:

  • 1 cup olive oil
  • 1/2 cup soy sauce
  • 2 scallions, green and white parts
  • 3 cloves garlic, crushed and peeled
  • 2 Tbsp honey
  • 2 Tbsp white wine
  • Salt and fresh ground pepper
  • 3 lbs Maitake Frondosa

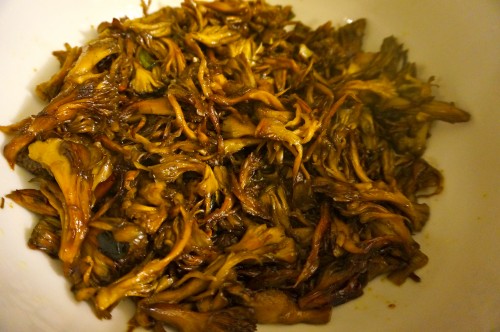
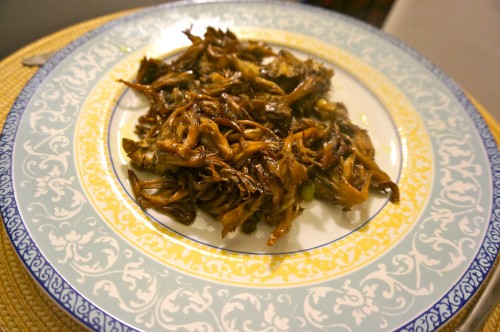
Blend the olive oil, whole pieces of scallion whites, whole garlic cloves, honey, 2 Tbsp wine, salt and fresh ground black pepper in blender. My handy dandy immersion blender worked great for this :) Then you either need to find a giant zip lock bag or a bowl and pour the sauce over the mushrooms and let them soak it up in the fridge over night. Save half a cup of the marinade for the reduction sauce the next day. While this recipe suggest barbecuing the mushrooms or using a cast iron skillet, I unfortunately had neither so I just used a big pan to saute them up. Don’t worry -they still tasted great! Just make sure to leave them alone and let them cook for a really long time until they start to get brown and crispy. While they are cooking, you can make the reduction sauce by adding 3 Tbsp of white wine to the reserved 1/2 cup of marinade and reducing it to a simmer after you’ve brought it to a boil. When the mushrooms are nice and crispy you can spread the reduction sauce on them and it tastes so good!

Barbecued maitake

Barbequed maitake

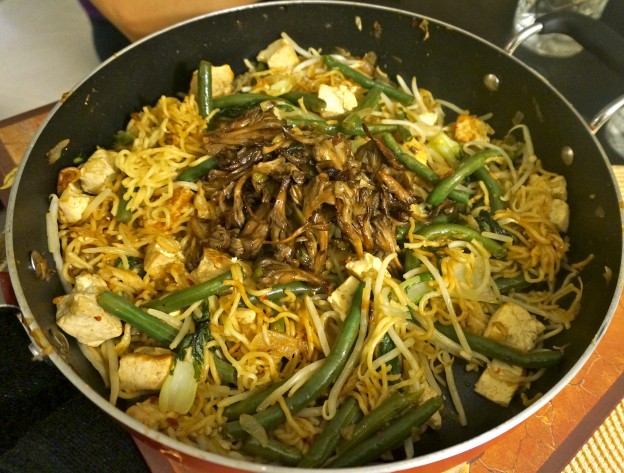
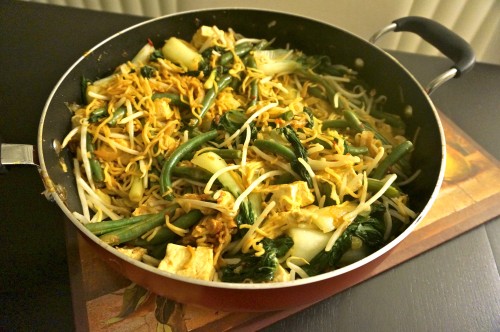
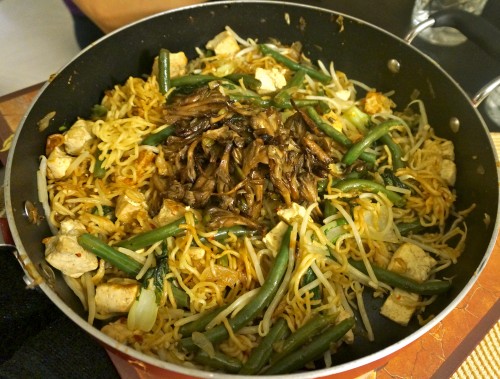
I decided that this meaty mushroom  would make a great accompaniment to the vegetarian mee goreng from Plenty, which I featured in this post.  Mee goreng is a Malaysian street food that is super healthy and super simple, and takes only a few minutes to stir fry up after all the vegetables have been chopped and prepared.

Mee goreng

Mee goreng

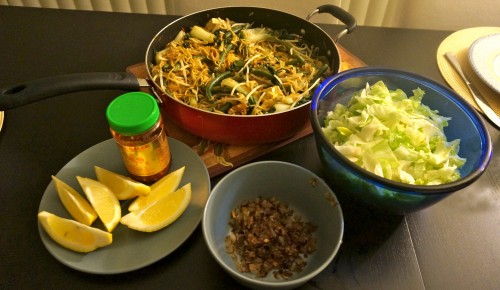
Ottolenghi suggests serving the mee goreng with shredded lettuce, fried shallots, lemon wedges, and a Malaysian spicy chili sauce called sambal oelek. Fortunately I was able to find sambal oelek  at Berkeley bowl, but it looks like it is super easy to buy online!

Mee goreng with lettuce, lemon wedges, sambal oelek, and fried shallots

Mee goreng with lettuce, lemon wedges, Sambal oelek, and fried shallots

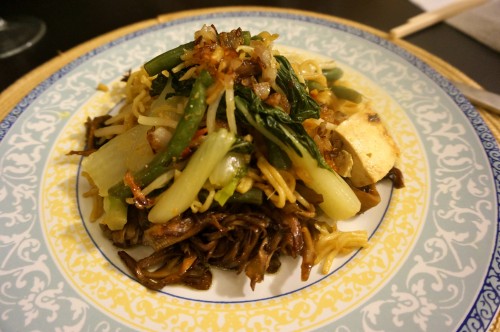
Here is my plate all loaded up with mee goreng:

DSC00866

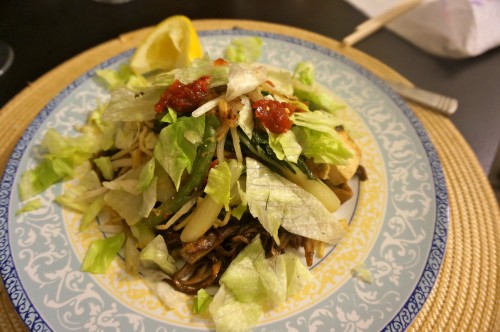
Here is the mee goreng served as suggested with the shredded lettuce, lemon wedges, fried shallots, and sambal oelek on top:

DSC00871

It went really well with the maitake mushrooms and my friends Judy and Meera gratefully gobbled it up. They were both super fun to cook for and claimed that these dishes induced euphoria and it was hands down one of the best meals they’d eaten that year.  This meal was probably the easiest and simplest of my three Gourmet Mushrooms Inc. feasts. It was also probably the most delectable! Don’t you just love when that happens?

Mee goreng with bbqed maitake

Mee goreng with BBQed maitake

Cheesy mushroom lasagna

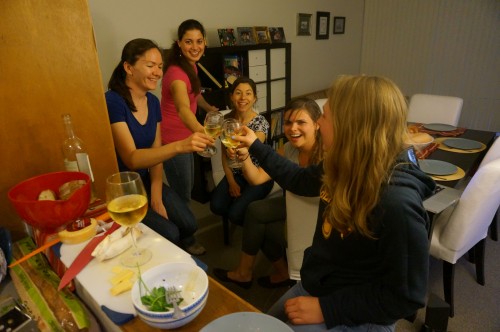
I’ve never made a lasagna before but this seemed like a good use for the Italian Velvet pioppini mushrooms, and I thought the Trumpet royales would be a nice meaty addition. I found this recipe in Yotam Ottolenghi’s Plenty, and he claims that it’s the very best cheesy lasagna, and who am I to argue with Ottolenghi? This is definitely not a dish to make if you are watching your waistline, since it involves LOTS of butter and LOTS of different kinds of cheeses.  I usually prefer to cook the lighter middle eastern themed dishes, but I figured I should include at least one rich, decadent, creamy recipe with my mushrooms! Besides, this is a great dish to feed a crowd, which was great, since I invited 5 lovely ladies to enjoy the meal with me.

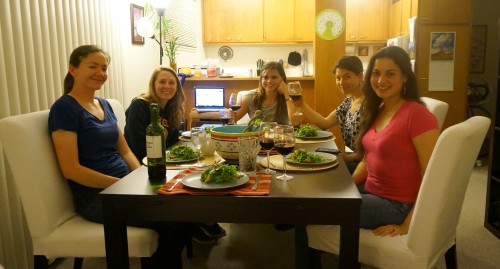
Stella, Meera, Lauren, Simone, and Claire  toasting to ladies and mushrooms!

Toasting to ladies and mushrooms!

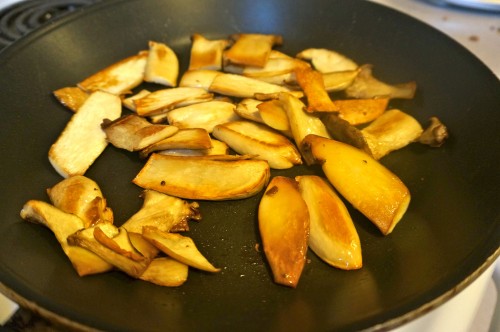
This dish is also pretty involved and requires lots of different components and long cooking times, so we enjoyed some wine and crostinis with butter and sauteed mushrooms while the food cooked.  Ottolenghi suggests using porcinis and assorted mixed mushrooms for this dish, but the Velvet pioppini and  Trumpet royale mushrooms worked great! First I preheated the oven to 350 F, then I cut and sauteed the Trumpet royale mushrooms in butter:

Trumpet royale mushrooms

Trumpet royale mushrooms

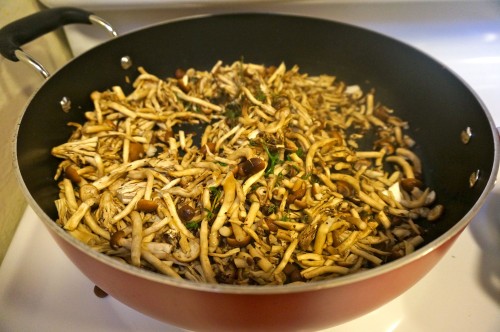
I used some of these for the appetizer crostinis, and the rest I saved for the lasagna.  Next I cut and sauteed the pioppini mushrooms in butter and added a few springs of thyme.

pioppiniandkingtrumpetscooking


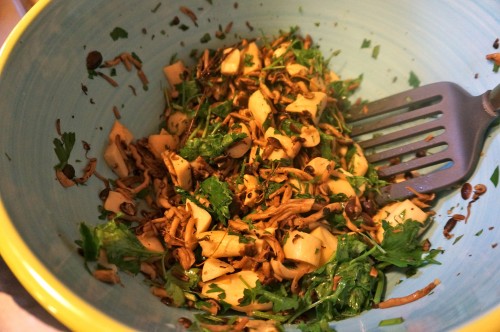
Once the mushrooms were cooked, I added 2 tbsp chopped tarragon and 4 tbsp chopped parsley, and set it aside for later. Don’t the mushrooms look tasty with all of the bright green herbs?

Sauteed mushrooms in butter, with thyme, parsley, and tarragon.

Sauteed mushrooms in butter, with thyme, parsley, and tarragon.

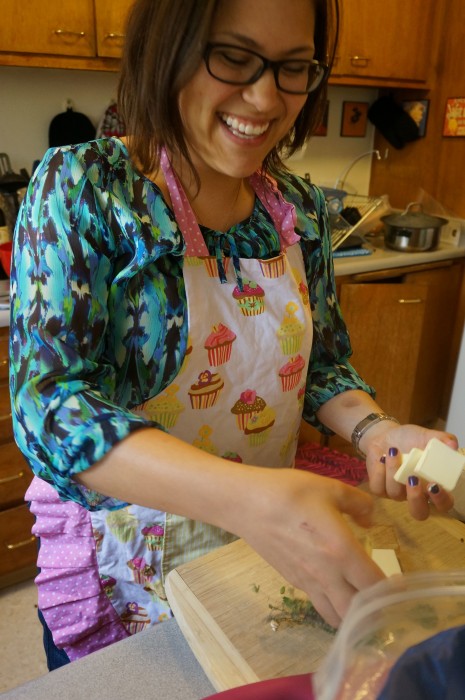
Next I made the bechamel, which of course I had never made before.  It involves – you guessed it – lots of butter! After melting 5 tbsp of butter and adding a chopped shallot, which I cooked for a minute, then I had to add 0.5 cup flour and stir continuously for 2 minutes. This is the part where things got a bit tricky and I’m not quite sure I did everything right. You are supposed to add 2.5 cups of milk, 0.5 tsp salt, whisk until boiling, then simmer for 10 minutes. This seemed to reduce a lot and didn’t make nearly as much bechamel as I thought I was supposed to have for this lasagna. Granted, we were supposed to add 6oz of Gruyere to the bechamel, which I did not do because one of my friends accidentally brought smoked Gouda instead of Gruyere and I thought the smoked Gouda would overwhelm the dish so I just left it out.  Perhaps that would have made a large difference in volume and I would have had a lot more ooey gooey lasagna. So this lasagna only had 4 types of cheese instead of 5! Oh well :) The bechamel is supposed to coat the bottom of the lasagna pan, and is supposed to top every layer of the lasagna, but we definitely did not have enough to top every layer. Here I am chopping the butter for the bechamel:

Cutting up butter for the bechamel

Cutting up butter for the bechamel

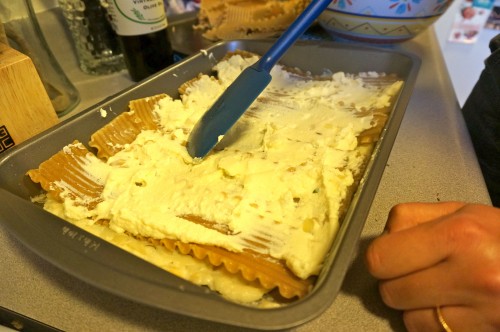
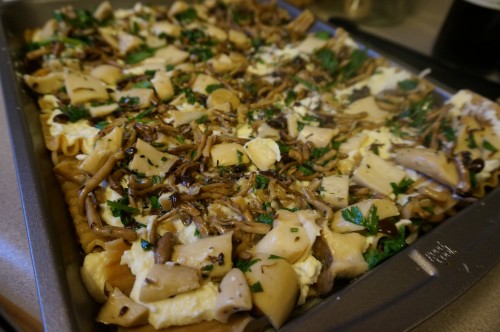
For the next layer of the lasagna, I mixed 13 oz of ricotta with an egg, 3 tbsp of the bechamel sauce, and 5 oz of feta.  For the noodles I substituted whole wheat lasagna for spinach lasagna, which I could not find anywhere. My friend Stella graciously boiled each lasagna noodle for a few minutes before I layered them into the lasagna. There seems to be a lot of room for flexibility when it comes to layering a lasagna. Clearly it depends on the size of the pan you use and the size of the noodles, so my lasagna only ended up having 3 layers of noodles and one layer of bechamel sauce to coat the bottom. After coating the bottom with the bechamel, then adding a layer of lasagna noodles, I then spread the ricotta/feta/egg mixture on top.

Spreading the ricotta/feta/egg mixture on top of the lasagna noodles

Spreading the ricotta/feta/egg mixture on top of the lasagna noodles

Next, I added the mushroom and herb mixture.

Mushrooms sauteed in butter and herbs layered into the lasagna

Mushrooms sauteed in butter and herbs layered into the lasagna

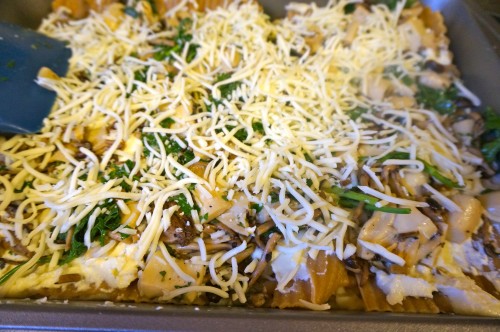
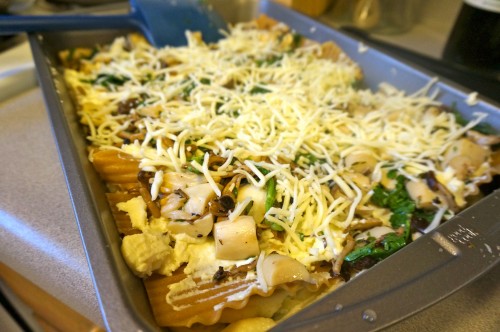
On top of the mushrooms we added shredded Mozarella:

Lasagna noodles layered with ricotta/egg/feta mixture, mushrooms and herbs, and shredded mozzarella

Lasagna noodles layered with ricotta/egg/feta mixture, mushrooms and herbs, and shredded mozzarella

shreddedcheeseandmushrooms2


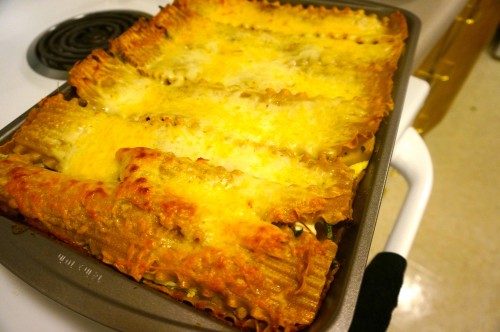
I made two such layers, then added another layer of noodles and topped with more mozzarella and some parmesan (told you this recipe involved lots of cheese!).  Then I covered the lasagna in foil, and baked it for 40 minutes at 350 F (thankfully I had preheated the oven!). After 40 minutes you are supposed to remove the foil and leave in for another 10 minutes. At this point the parmesan came out nice and golden:

Mushroom lasagna topped with shredded mozzarella and parmesan

Mushroom lasagna topped with shredded mozzarella and parmesan

After 40 minutes my friends were a bit antsy, and it was not very easy getting them to wait the required 10 minute resting period after the lasagna came out of the oven.  I fed them arugula and tomato salad while they waited for the lasagna, which was a nice pairing (thanks to Ottolenghi for the tip!). Here’s all my friends eating the salad while they eagerly awaited the lasagna:

ladiesatable

Stella, Claire, Simone, Lauren, and Meera waiting for the lasagna to come out!

Needless to say, they were very excited once I finally let them cut into it:

Mushroom and cheese lasagna

Mushroom and cheese lasagna

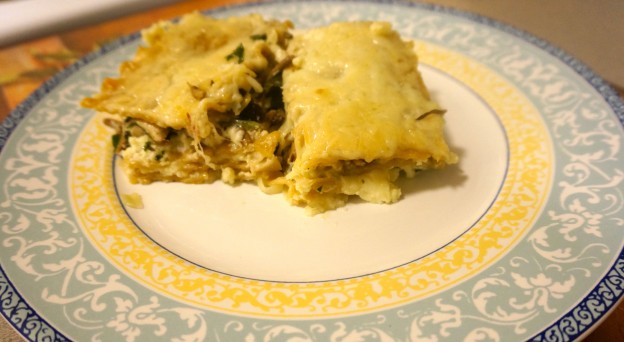
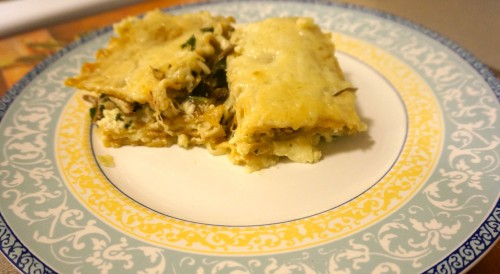
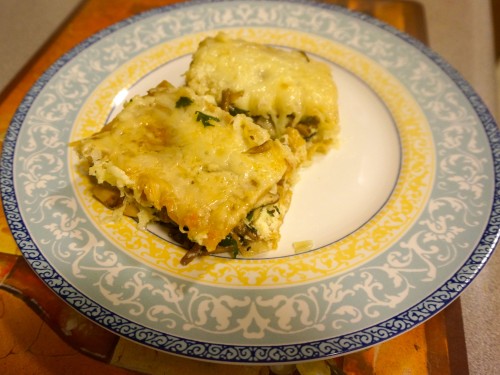
The lasagna was very cheesy and rich:

lasagnaonprettyplate2lasagnaonprettyplate4
Overall, it was a very fun night filled with decadent cheesy mushroom lasagna, wine, and good friends. Here’s to mushrooms and girlfriends – two things I could definitely never do without!

Marinated mushrooms with walnut and tahini yogurt, chermoula eggplant with bulgur and yogurt, and butternut squash and tahini dip

I know you’ve all been anxious to hear about the meals that I made with my mushrooms from Gourmet Mushrooms, Inc  :P No fear, here is the first installation :)  For this meal I looked to my main man Yotam Ottolenghi for inspiration and found an awesome recipe in Plenty featuring the brown clamshell mushroom. I was so inspired that I decided to make 2 other dishes to accompany it. Admittedly, this meal was a bit ambitious. It took 3 hours + to make all this stuff. There were many extended periods of roasting things in the oven and letting things marinade, so plan accordingly. The butternut squash and tahini dip is just an amazing mezze (AKA a middle eastern small plate or appetizer) that goes well as a spread for pita or carrots on any occasion. It’s really just an unexpected and spectacular dish that is sure to be a crowd pleaser. It is also relatively simple to make and makes a huge batch that presumably could be frozen or used as an appetizer at a large party. The chermoula eggplant with bulgur and yogurt is a bit of an involved recipe, but it went really well with the marinated mushrooms with tahini and walnuts dish, which was fortunately super easy to make.

The first dish I made on Saturday, was the Butternut squash and tahini dip from Jerusalem because the butternut squash needs to be roasted in the oven for over an hour. This happens to be the first dish that I made from Jerusalem back in December, and is the dish that inspired me to buy the book! This dip is seriously the bomb. Also, I was really excited to finally get an excuse to use the date syrup that I bought in Israel at the duty free store with my last shekels right before I hopped on the plane back to the US :)

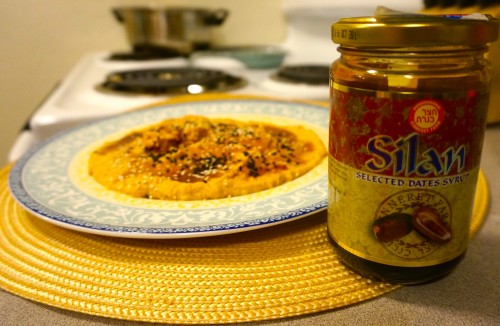
datesyrup

Date syrup is an essential ingredient for the butternut squash and tahini dip

This to-die-for dip is actually pretty simple to make. Basically, you peel and chop up a huge butternut squash, cover it in 3 tbsp olive oil and 1 tsp cinnamon and 0.5 tsp salt, then roast it in the oven at 400 F for a really long time until it gets soft (70-80 min). Once it’s soft, add 0.5 cup Greek yogurt, 5 tbsp tahini, and 2 garlic cloves, crushed. Then the hard part is finding a tool to blend it with. I don’t have a food processor, but fortunately my hand held immersion blender worked really well for this. I seriously recommend buying an immersion blender. They are super useful and versatile!

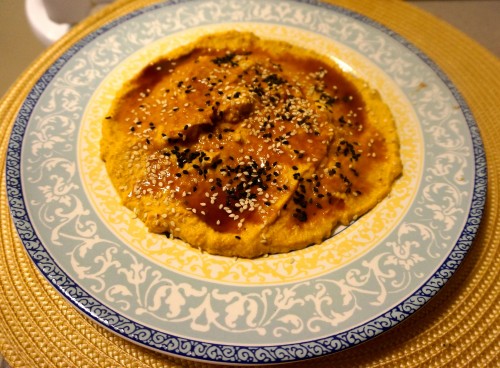
butternutsquashdip

This dip is so good and really unexpected. You expect hummus and then get this sweet butternut squash concoction.  What really sets this dish apart and raises it to the next level is the addition of date syrup. It’s really not optional here; the dish simply isn’t as good without it! So find yourself a middle eastern market or fly to Israel, but get yourself some decadent date syrup to add to this dish :) Then sprinkle with white and black sesame seeds for the finishing touches. It’s really good with pita and carrots, and this week I will learn how it tastes as an accompaniment to matzah :)

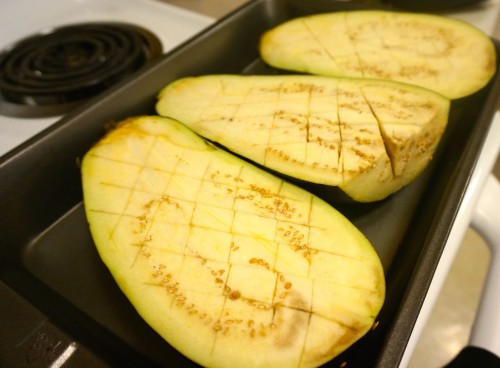
The second dish I made was the Chermoula eggplant with bulgur and yogurt from Yotam Ottolenghi’s Jerusalem. Luckily, my oven was already pre-heated to 400 F from the butternut squash, so I just added the eggplant to the oven with the squash for efficiency. Before sticking them in the oven, cut the eggplants in half and cut deep criss crosses into them with a knife:

scoredeggplantangled

Scored eggplant with deep criss crosses

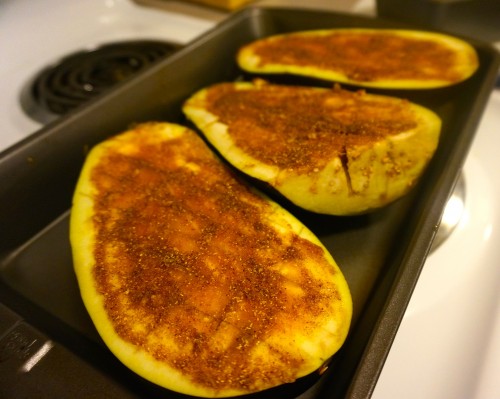
Next, make the chermoula by mixing together 2 crushed cloves of garlic (if you don’t have one, go out and buy yourself a garlic press, they are great!), 2 tsp cumin, 2 tsp coriander, 1 tsp chilli flakes, 1 tsp paprika, approximately half a cup of olive oil, 0.5 tsp salt and 2 tbsp of finely chopped preserved lemon peel.  So the lemon peel for me was too much of a hassle to make (it involves canning and storing the peel for over a week), and I just could not find it in any store, so I just added some lemon zest to the chermoula. Then you have to carefully spoon the chermoula over the scored eggplant halves:

scoredeggplantwchermoulaangled

Scored eggplant with chermoula

Next, leave the eggplant in the oven for a long time. It took way more than 40 minutes to get the eggplant to the desired soft texture for me. I think it’s best when it’s fully cooked through and mushy and the color changes from white to a greenish wet looking hue. For me this took closer to 50-60 minutes. My advice is to keep checking on it and better to leave it longer than risk eating undercooked eggplant, which is really not great.

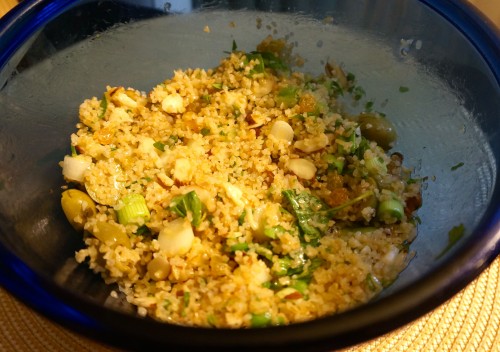
While the eggplant is cooking, add 2/3 cup of boiling water to 1 cup of bulgur and soak 1/3 cup golden raisins in warm water for 10 minutes.  Next add herbs (I didn’t happen to have cilantro and some of my friends hate it so I just stuck to mint for this one), 1/3 cup halved pitted green olives, 1/3 cup slivered almonds (thank you, Berkeley bowl bulk aisle!), 3 chopped spring onions, 1.5 tbsp fresh squeezed lemon juice, and a pinch of salt to the bulgur and raisins.

bulgurwslicedalmondgreenonionsolivesetc

Bulgur with slivered almonds, golden raisins, herbs, green olives, and lemon juice

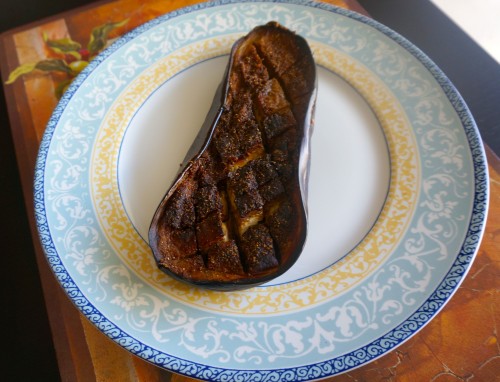
When the eggplant is fully cooked it will look something like this:

chermoulaeggplantfromtop

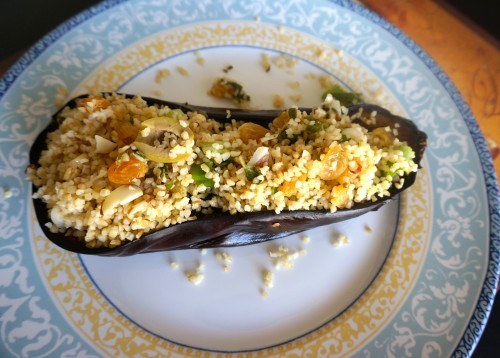
Add a scoop of the yummy bulgur mixture:

eggplantwithfillingcloseup


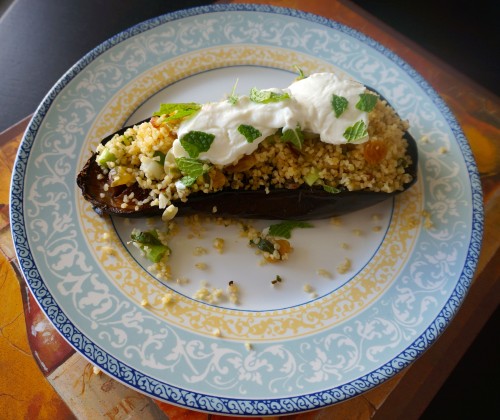
For the final touch, add a dollop of Greek yogurt and some sprigs of mint (I just got a potted mint plant and I’m so excited about it!). Isn’t that beautiful? It also served as a beautiful complement to the marinated mushrooms, which I’m sure you’ve all been patiently waiting to read about :)

chermoulaeggplantwithyogurtgood2

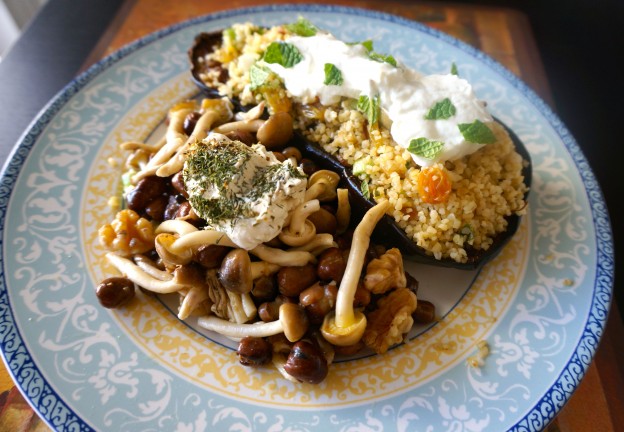
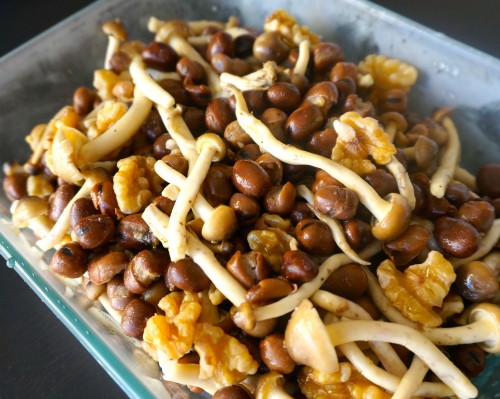
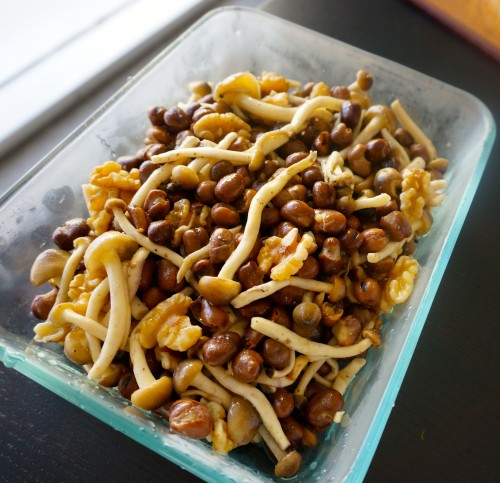
I found this recipe for Marinated mushrooms with walnut and tahini yogurt while perusing Yotam Ottolenghi’s Plenty and Jerusalem for recipe ideas for my mushrooms.  This sounded like a great use for my brown clamshell AKA shimeji mushrooms.  For this one you also have to do some advanced preparations, which unfortunately I did not realize until the last minute.  You need to mix up the marinade and pour it over the mushrooms and let them marinade for up to an hour before serving. Since I did not realize this at first, I only let them sit for 30 minutes before eating them for dinner because it was already so late. Luckily, they had tons of time to marinate over night and were way better the next day when I brought the majority of the mushrooms to a lab pot luck party :) The marinade consists of 1/3 cup olive oil, 1 tbsp white wine vinegar, 1 tbsp maple syrup  (I always only use pure maple syrup – I lived on a farm for 4 months in high school and we made maple syrup ourselves from maple trees and now I could never go back to the fake stuff!), juice of one lemon, and 0.5 tsp salt. After the mushrooms have marinated, add 3 cups of fava beans and 2/3 cup walnuts.  I’ve found fava beans super hard to find, so I just used the canned version. I also did not bother removing the skins, because really, who has time for that? Besides, all the nutrients are in the skins anyway :)

marinatedmushroom3

Marinated mushrooms with walnuts and fava beans

marinatedmushroomswithfavabeansandwalnut

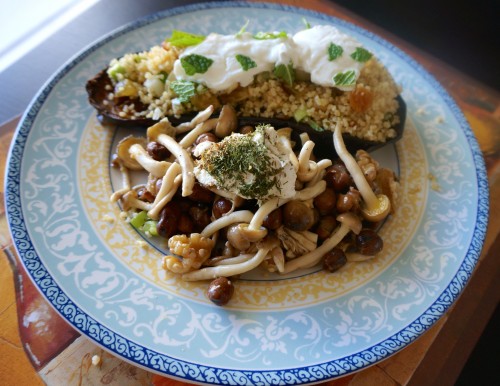
To complete the dish, whisk together 0.5 cup Greek yogurt with 2.5 tbsp tahini, 1 small garlic clove, juice of another lemon, and some salt. Then add a dollop of that to the mushrooms and sprinkle with dill and oregano. This dish goes really well with the chermoula eggplant dish. They complement each other very nicely :)

mushroomsandeggplantdish

I cooked this huge feast on Saturday evening, and then I invited over my friend Meera to enjoy the dishes on Sunday early afternoon before I brought the rest of the mushrooms to the lab potluck party. Meera is the one who inspired me to get Jerusalem in the first place, and I love inviting her over because she always very enthusiastically enjoys all of my dishes :)  So thanks, Meera, for inspiring me to buy Yotam Ottolenghi’s books in the first place, and for enthusiastically taste testing all three of my mushroom themed feasts this week!